Pages

31 May 2015

Wall plate installation

Saturday was a semi decent day of weather so Jaimin headed out again to make progress on the wall plate, so that we can start on truss erection soon.

The day was split in to preparation and installation and was very productive.
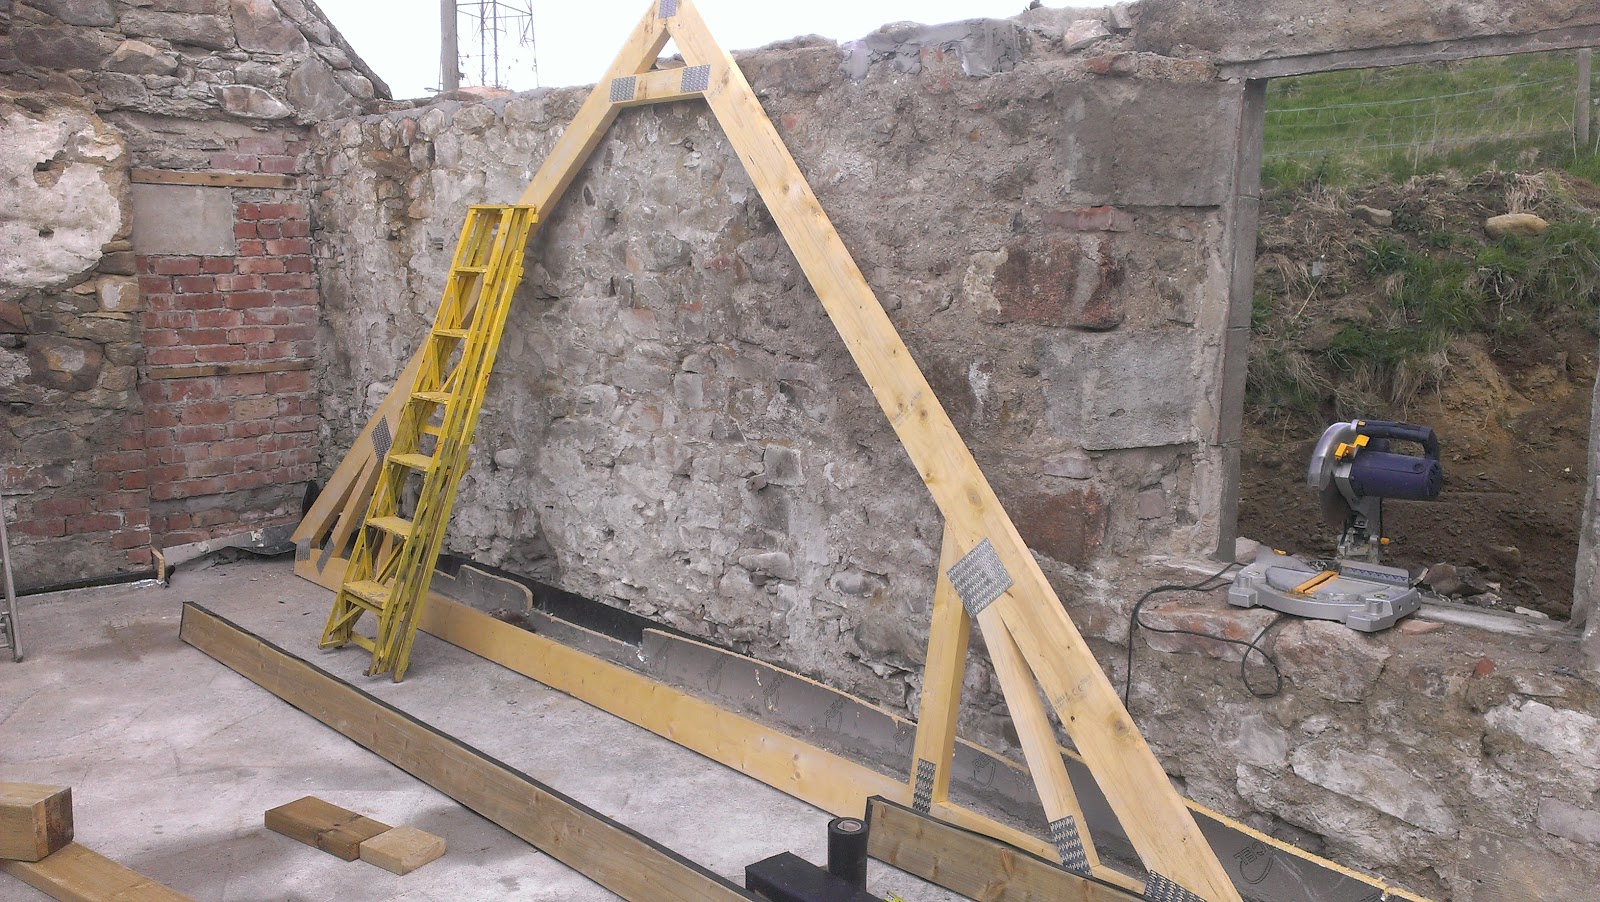
First off Jaimin had to lower the truss that was up from yesterday. This involved some luck, thought, geometry and use of ladders as supports. Interesting to say the least.


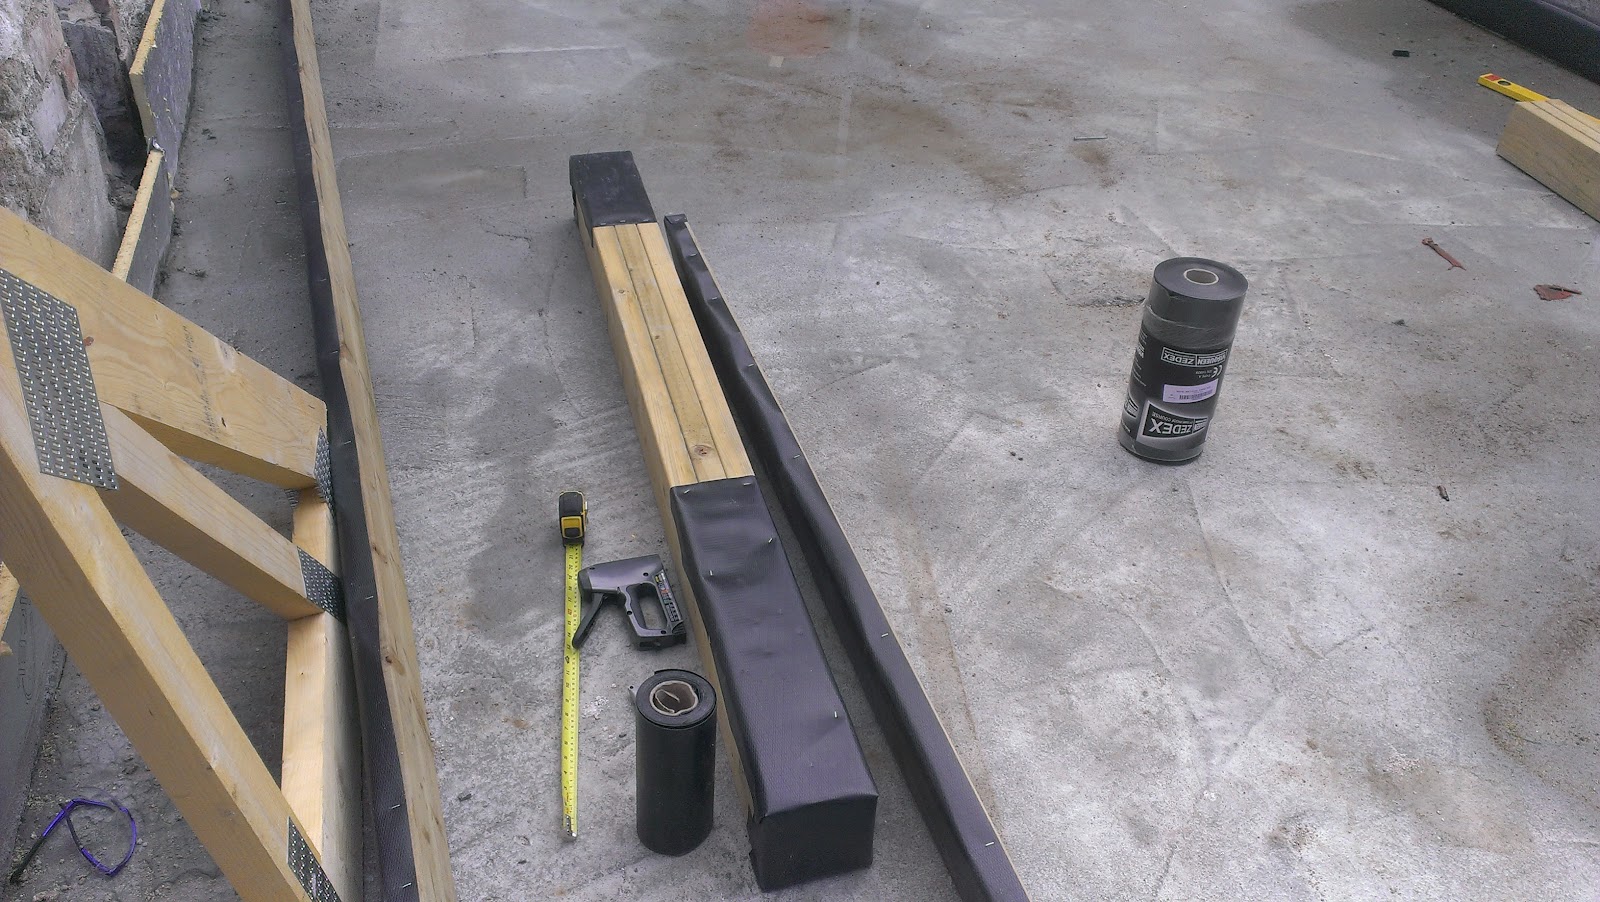
Next he removed all the C16 wall plate timber from the walls, took down the lintels and backed them in a DPC (damp proof course) to protect it from the masonry.


Once that was complete he reinstated all the timber, and set up the laser level to see how level the wall head (top of the stone wall) and then the wall plate timbers, were. It was very good, but needed a tickle below the window lintels and under once or 2 spots of wall plate. Having established the requirements he cut out a 600mm spacer, and went along the wall plate with a pen to mark  off the approximate locations of the trusses and the hammer fixings (600mm centers along the wall plate). The double trusses needed accounting for which was a little tricky but worked out fine.

At 1530, Simon turned up to then lend a hand.  The first thing to do was to get the whole thing level. Some mortar was mixed in the barrow and one person was used to support and hold up timbers while the other person laid mortar beneath it to raise the level. Simon likes the electromechanical toys on show and seems to be happy with his levelling skills:


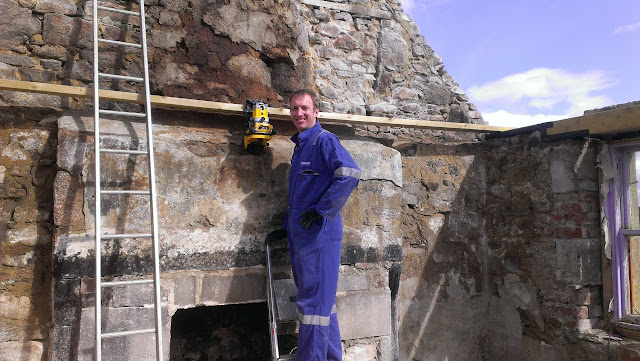
Next they had to make the wall plates as straight as possible along the wall and check they were parallel. This was done using the laser measure, and although it was never going to be millimetre perfect was within 10mm along the length of the building, so pretty good.

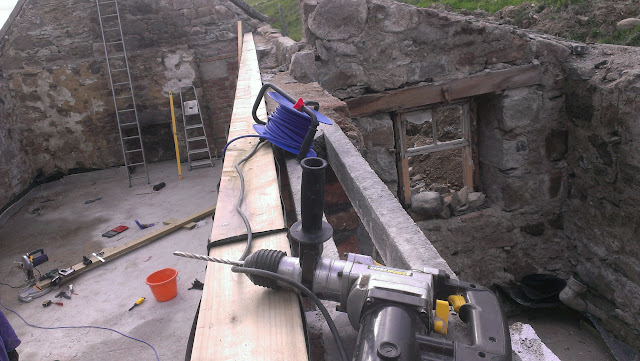
Once the levelling and straightening was complete, it was time to get Thomas's SDS drill out and stick in a new 8mm DeWalt bit to drill some fixing holes! Simon was on hammer drilling while Jaimin made the holes in the timber using an 8mm timber bit and the cordless. Installing the hammer fixings was very easy - push in the plug and hammer firmly! Only one fixing went awry, but it's not going anywhere anyway...


A great lot of progress for one day and we are now ready to install some trusses, somehow...

Planning Permission (& Truss delivery)

On Thursday 2 significant things happened, one more significant that the other.

First and foremost it was the day of the Local Review Body meeting where tabled and decided our appeal for planning permission for the main house. At around 4 pm we were informed by Peter (the architect who we've all forgotten about over the past few months) that we were granted planning permission!

This is how it played out:

Motion
Councillor Fergus Hood, seconded by Councillor Peter Bellarby

“To DISMISS the Notice of Review and Uphold the Appointed Officer’s decision to REFUSE for the reasons stated within the decision notice issued on 27 February, 2015”

Amendment
Councillor Cryle Shand, seconded by Councillor Alastair Ross

“To UPHOLD the Notice of Review and REVERSE the determination reviewed by it and GRANT Full Planning Permission subject to appropriate conditions”

The Vote was :
  • for the MOTION – Cllr Bellarby, Cassie and Hood (3) and 
  • for the AMENDMENT – Cllr Pratt, Ross and Shand (3)

Those in support of the proposed development took the view that the design of a dwellinghouse should on this occasion not be used as a reason for refusal as there was latitude within the Aberdeenshire Local Development Plan policies to accept a design which was innovative and did not necessarily follow the traditional vernacular or contemporary design feature within the surrounding area. Because the Chairman (Cllr Pratt) has the casting vote, the Amendment won the vote.

To think it has taken so long is very frustrating of course, and that it came so close as to be made by a single person's position on the Review Body is probably testament to the complexity of the case, but it does go to highlight the obvious flaws in the planning system.  Why couldn't the planners see and use the "latitude in the Local Development Plan" in the first place? etc etc etc ad infinitum.

The second thing of significance was that we took then took delivery of the trusses.
Brad lent a hand to offload and stack them, and then helped Jaimin to lift one on to the walls to see how close they would be to fitting... Thankfully they look pretty good, we think. Now we need to get them up!


After Brad helped Jaimin lay the truss down, he got on with cutting the wall plate timbers to size.


Lintels & Soil Pipe Progress

Having earned a break, last weekend Lucy and Jaimin went to Greece for a friend's wedding. In their absence, James and Simon stepped up in a massive way to help keep things moving, and using the Small Buildings Structural Guidance document (page 68) made up a set of brand new set of lintels. Based on a few sources including SBSG, the Rhodes' structural drawings and some online research, triple beams of C24 treated structural timber was used, with galvanised screws to fasten according to the nailing schedule.
Simon hard at work


Once the lintels were done they got on to some digging, and managed to dig out a long length of the clay pipe which helped deepen the soil pipe trench. Hard going but much appreciated.


20 May 2015

Pouring the slab

Today was a busy and big day. After all the preparation and the last minute decision to bring forward the slab pour, and to use the costly but very efficient Lovie's concrete pump, it was about to happen.

After thinking a bit more about the shower pipe and due to the uncertainty it had created, some 11th hour decisions were made the night before including that we would barrier off the pipe and cement it in at a later date. Why we hadn't' already decided this is for another day...

Jaimin headed to the plot early via the quarry and set about building a quick timber frame barrier, then spreading another 1.25 tons of scalpings.

Shower pipe barrier

More scalpings...doing a great job.
The day really started with the arrival of the concrete pump. Thankfully he had no issues with getting to site, even though we had a couple of rain showers.

Arrival...
While he set himself up Lucy arrived with the kids and DVD players (good trick), and soon after, our guide for the day Bridget came too, despite being a bit under the weather. Huge thanks to her for her help even though she will claim no glory. :-)


One for Grand Designs...?

Jaimin set up a Garmin Virb on the window lintel to capture a time lapse of the saga. It was generously lent by Dr Bike of Enth Degree - (thanks)!


Once the pump was set up we waited on the mixer lorry who got a bit lost. Once he arrived he had some serious manoeuvring to do to reverse all the way down the track to the pump.


Then it all kicked off, and this is how it went (it might be better watched on YouTube?).


We were pleased with the results and it was a bonus to have got some driveway :-)


New driveway! Sort of.
Once the slab was done we breathed a sigh of relief, had a sandwich in the car while it rained, then tidied up and went home.

Thanks to the Rhodes' for spazzling, babysitting, equipment and advice; we would have struggled without it all.
Thanks to Dr Bike for the Garmin Virb which was just brilliant, way better than we expected.
And thanks to CHAP and Lovies for providing a very good service.

Next phase - roof.


18 May 2015

Rebar & shower trap

Saturday was split into 2 main jobs - insulation (in the last post) and rebar.
Once the insulation was in we went around with some more foam and then lots of foil backed tape to seal as many joints as we could. We don't know if this was needed and will help, but self builders bang on about this being the way to do it.

Installing the rebar was no easy feat, being 2.4 x 4.8m sheets and therefore unable to fit through the doorway... thankfully the roof was off so we could go over the walls with it, somehow. This was interesting and one of the times we wish we had a GoPro on a tripod.

Once we had it all in we had to tie it all together with anodized tie wire, and install small spacers to hold it above the insulation. These can be set up as 60mm or 75mm, and in our case laid on their side above the sleeper wall to give a 10mm gap. Some bricks were also used as they are 75mm and can be walked on, where the spacers pierce the insulation... :-(

Lucy tying spacers on and getting sunburnt by the reflection...
Rebar laid
On Sunday there was a bit more spacer tying to be done, then we had to go around the vertical 25mm "wall insulation" to draw on the FFL (Finished Floor Level) and TOC (Top of Concrete) so we have something to work towards. We used the laser level for this, which was pretty hard to see on the foil backed insulation! The TOC is marked as the Green line below:

The green lines, which should have been done before the rebar...
Once that was done Jaimin had the job of trying to get the shower trap installed and set up to the correct level, as the waste pipe has to be set in the slab. This has huge potential to go badly... After lengthy observations of the ridiculously bad "instructions" the most efficient method was some trusty slates and wire to hold them in place.
Shower trap installation... who knows how this will turn out.
Shower trap sticking out the wall


New levels of insulation

Having spent some time working out exactly what thickness and quantity of insulation would be required to top up the level, we took delivery mid week of varying sizes from 10mm to 90mm. Such discrepancy was not expected! No harm done though, it means we will have a minimum 130mm and maximum of 190mm if insulation in the floor, way above requirement. Once the first layer had been foamed in using around 12 cans of expanding foam, Jaimin had to wait for it to dry then trim it all to a reasonable level to allow installation of the second layer.


The week also saw 1.25 tons more quarry scalpings taken to site to be spread on the road (they seem to work very well) and Jaimin met a surveyor from Deeside  Road Construction who is going to quote for building us the track on to the plot. You can see them in grey on the track.

Quarry scalpings along the track
On the weekend, some real progress was made when Lucy and Freya came along to finish the laying of the second layer. More expandable foam was sprayed.


11 May 2015

Sub-floor progress

On Friday Lucy made a trip to the plot to meet the SSE PD team who will eventually be moving the meter to its external position. She also took receipt of the rebar, and then put in a big effort with Jack to move lots of sand to the cottage. Jaimin got hold of some more supplies (concrete spacers and tie wire) for later use.

The weekend consisted of transforming the sub floor of stoney sandy earth through the stages of:

  1. Sand spreading
  2. Levelling
  3. Installing the damp proof membrane
  4. Laying the floor insulation
  5. Preparing the rebar
The photo sequence shows this evolution well. Ali and Jaimin managed to get the sand levelled and although managing to compact it once, the compactor ended up breaking its drive belt so that game ended. They also squared off large parts of the sleeper walls with more concrete, then carried on with levelling and eventually installed the membrane. 


The next day Lucy and Jaimin had to get rid of the rain that had accumulated overnight, and proceeded to lay the insulation. It turns out (not totally unexpectedly) that the floor will be low, so this week will be installing extra insulation to raise it before installing the rebar and concrete. There will also be a lot of expanding foam on show this week to fill gaps and seal up the insulating layer.


Uncle Terry gets a special mention for coming along to help grade our slates - thanks!

7 May 2015

Electing quarry scalpings & sand

Today Jaimin borrowed Thomas & Bridget's trailer again and went to Craiglash Quarry to collect 1.5 tons of scalpings. These are sticky ungraded multi-sized (100mm to powder) off cuts from the quarry which make good sub base for tracks. Given the recent rain and delivery issues (trucks struggling with traction) we thought it a good plan to try and put some rock down.

Loading up

Weighing in
Although 1.5 tons looks like very little in the trailer, the car was feeling the weight. It took a while to empty out on to the track and only covered about 12m! But, hopefully a few more trips will keep building it up.

12m of scalpings = 1.5 tons!
After the scalpings were unloaded it was on to the levelling & sand. Some more raking, digging, spreading and confusion ensued. After some deliberation the decision was taken to get some sand in. If the floor is too low (which it is...) we'll just add cement, insulation and/ or screed when the time comes to build it up. No danger! A few barrows later and it was time to make for home, dropping off the trailer and going to the polling station!

Sand is starting to make its way in

Moooooooo!

Insulation delivery & Whacking sub base

Yesterday Jaimin started early and met the insulation delivery driver on site (who very nearly got stuck). After removing the 3 stuck sheep from the barn, they stacked the insulation. Supplies are coming in thick and fast...

Sarking boards
Sand pile 
Insulation
In the evening he collected the compactor plate or whacking plate and headed up to the plot. He did some more raking, levelling and then started up the whacker. This compacts the sub floor to make sure nothing will give way when load is applied. The vibration is pretty strong!

Whacking plate
The north west corner was still wet and sludgy from the rain, which left a gluey, batter like consistency in the earth. Hopefully it will dry out soon but it's in a protected part of the building with little wind or sun.