Pages

29 Jun 2016

More insulation, stove thermostat, plasterboard & cladding delivery

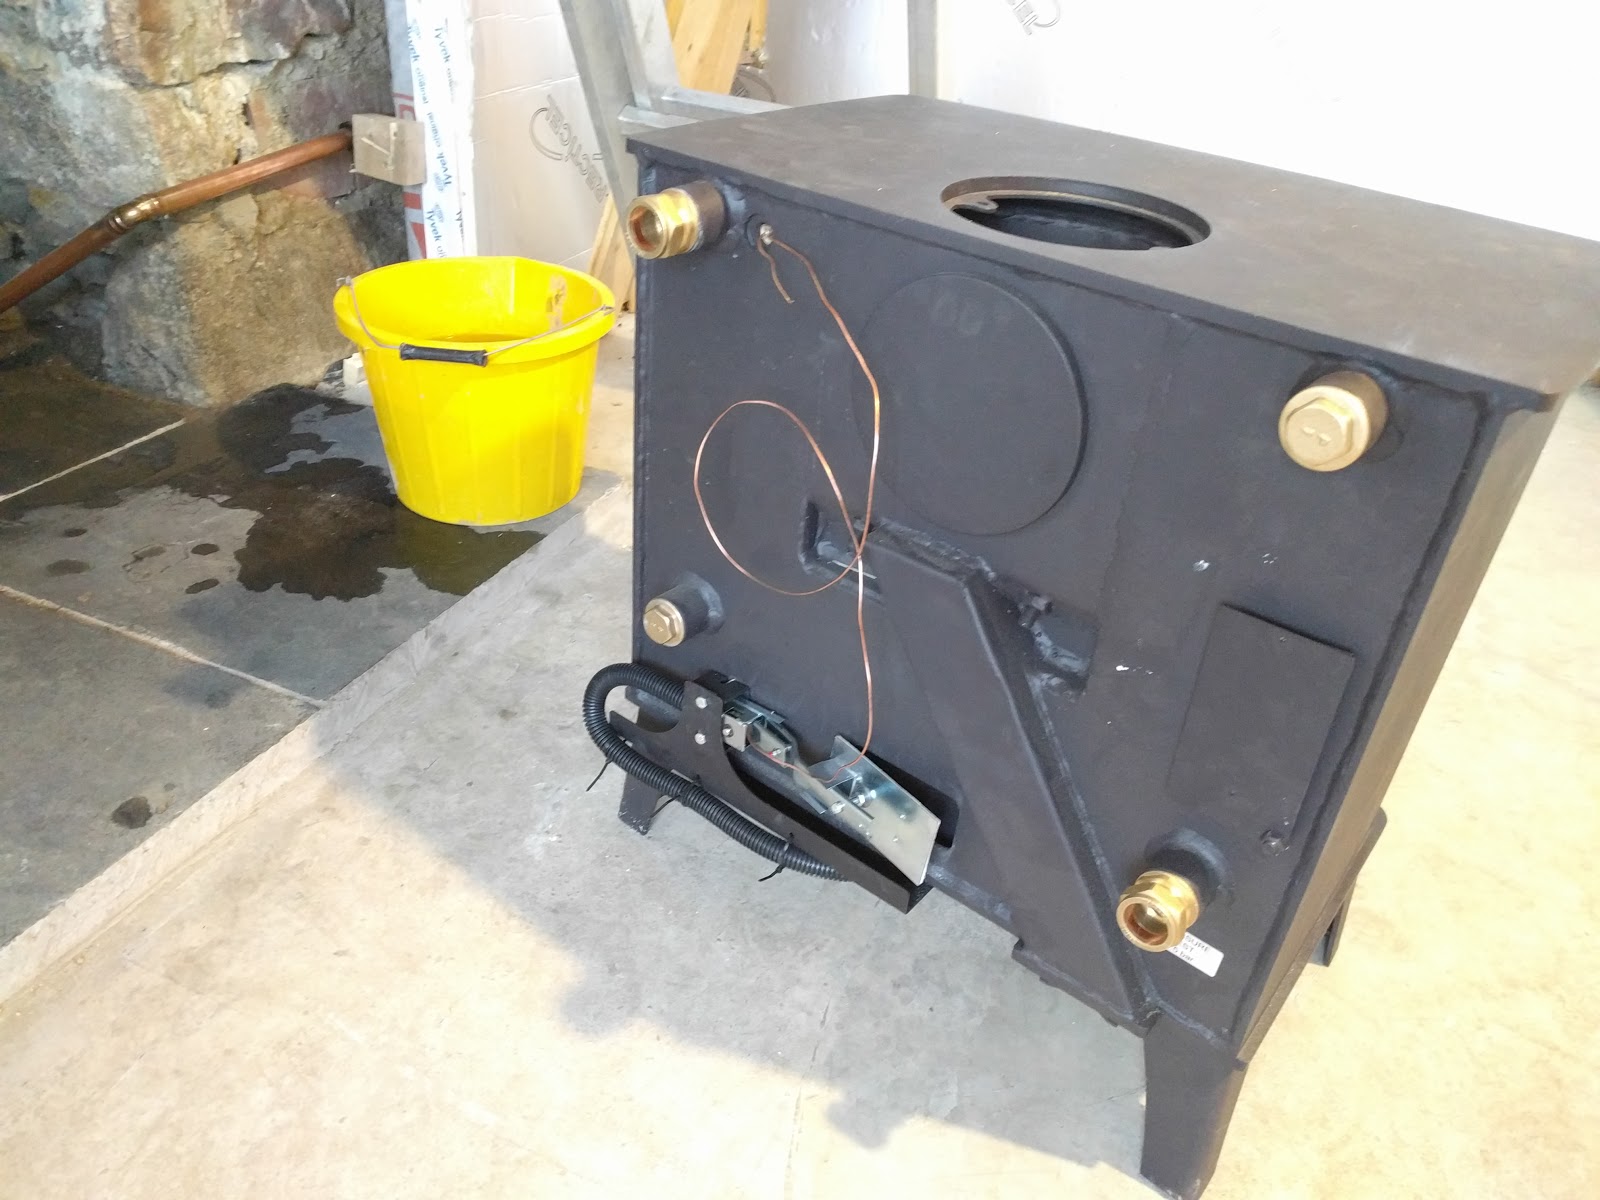
The stove needed to have its own thermostat installed, which though uncomplicated was another pending item to tick off.


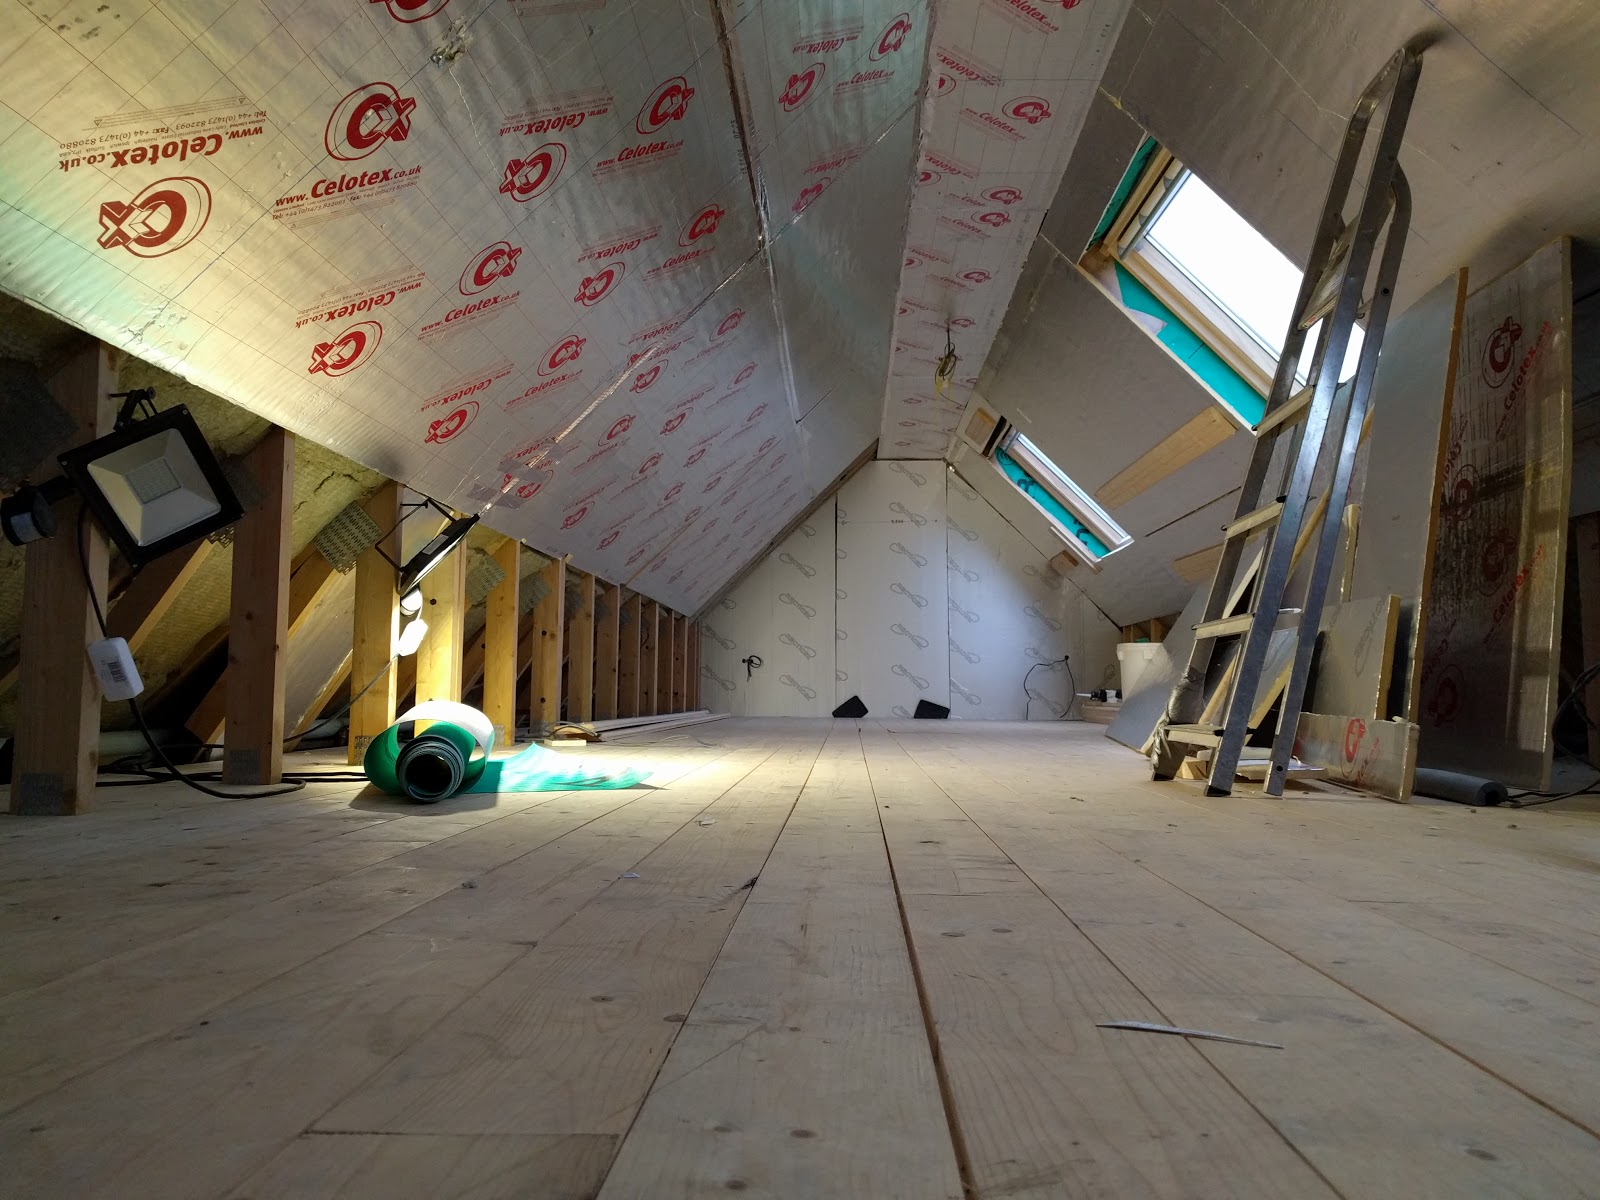
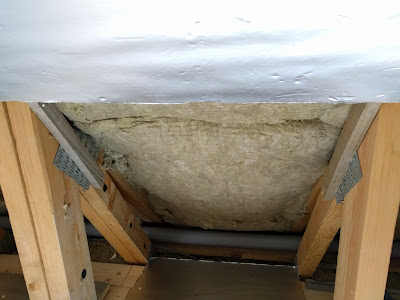
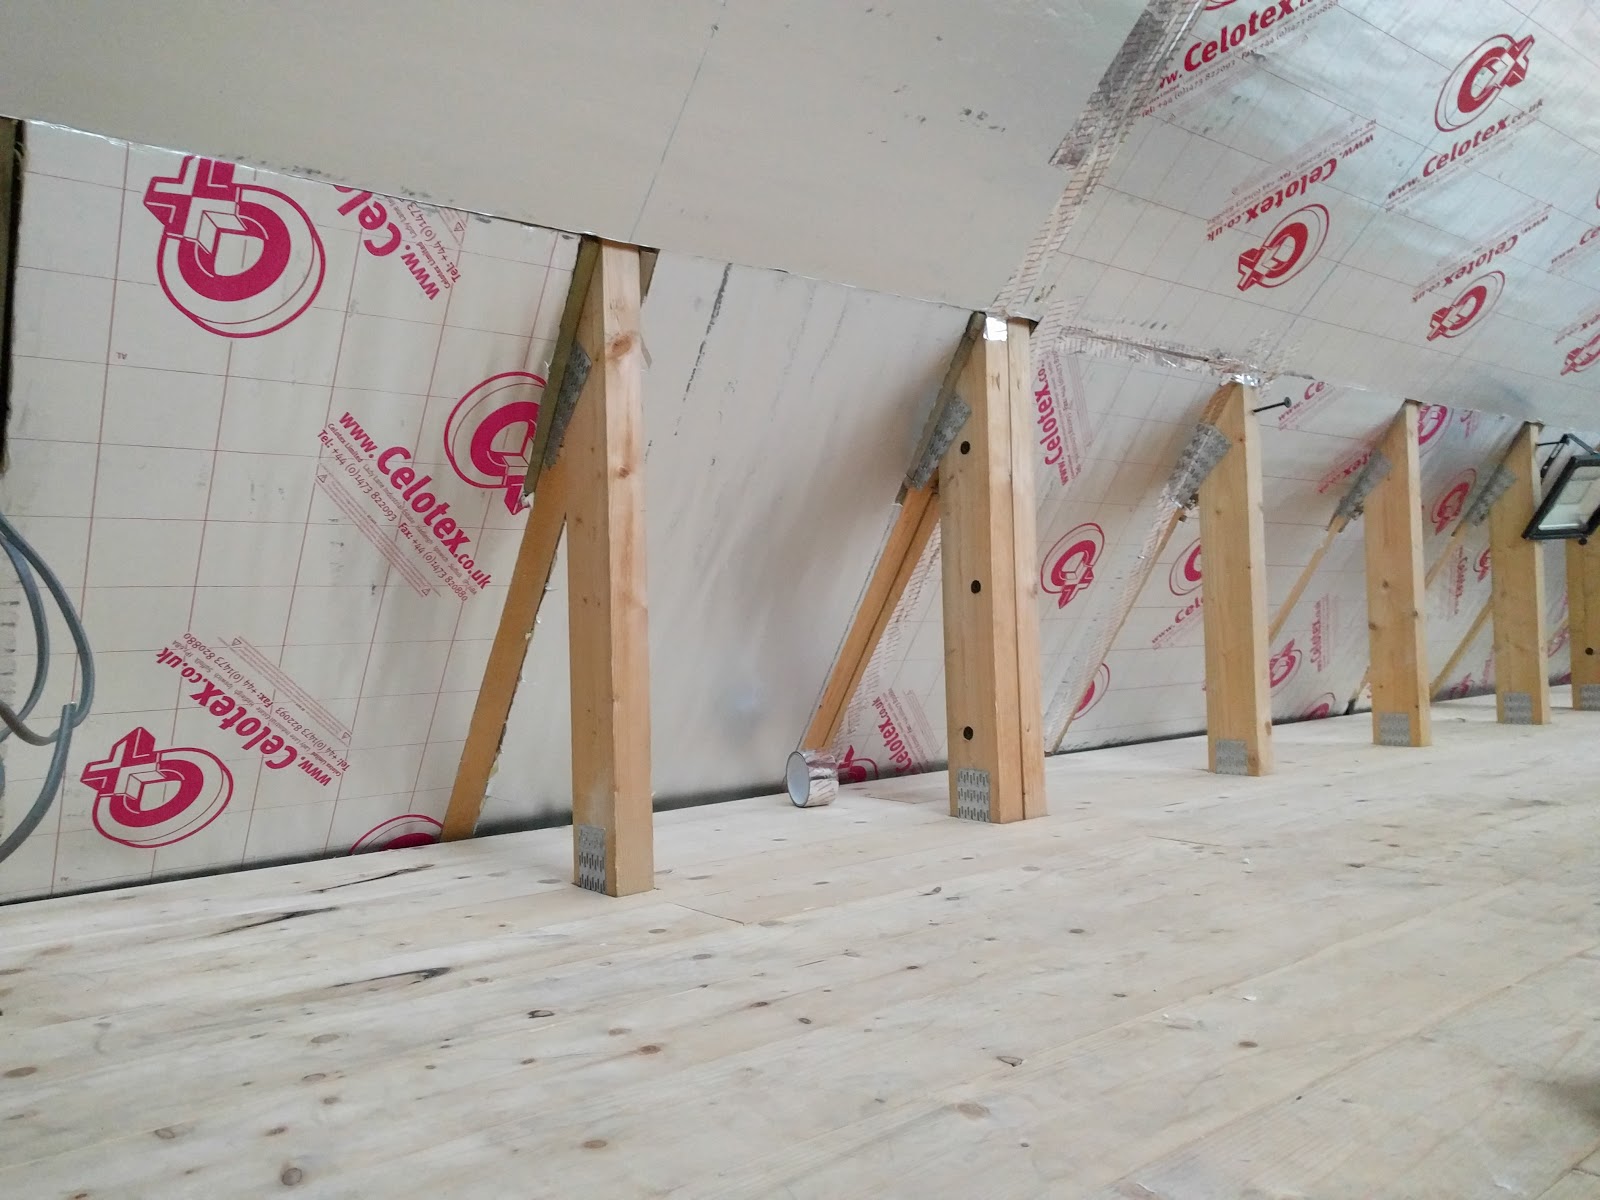
Jaimin has spent more time on insulation and is close to completing the PIR boards (taping is underway), with Simon's help thrown in sporadically. The internal eaves (roof coombes?) each needed boards cut to size with noggings installed to bear the cladding which will cover them.


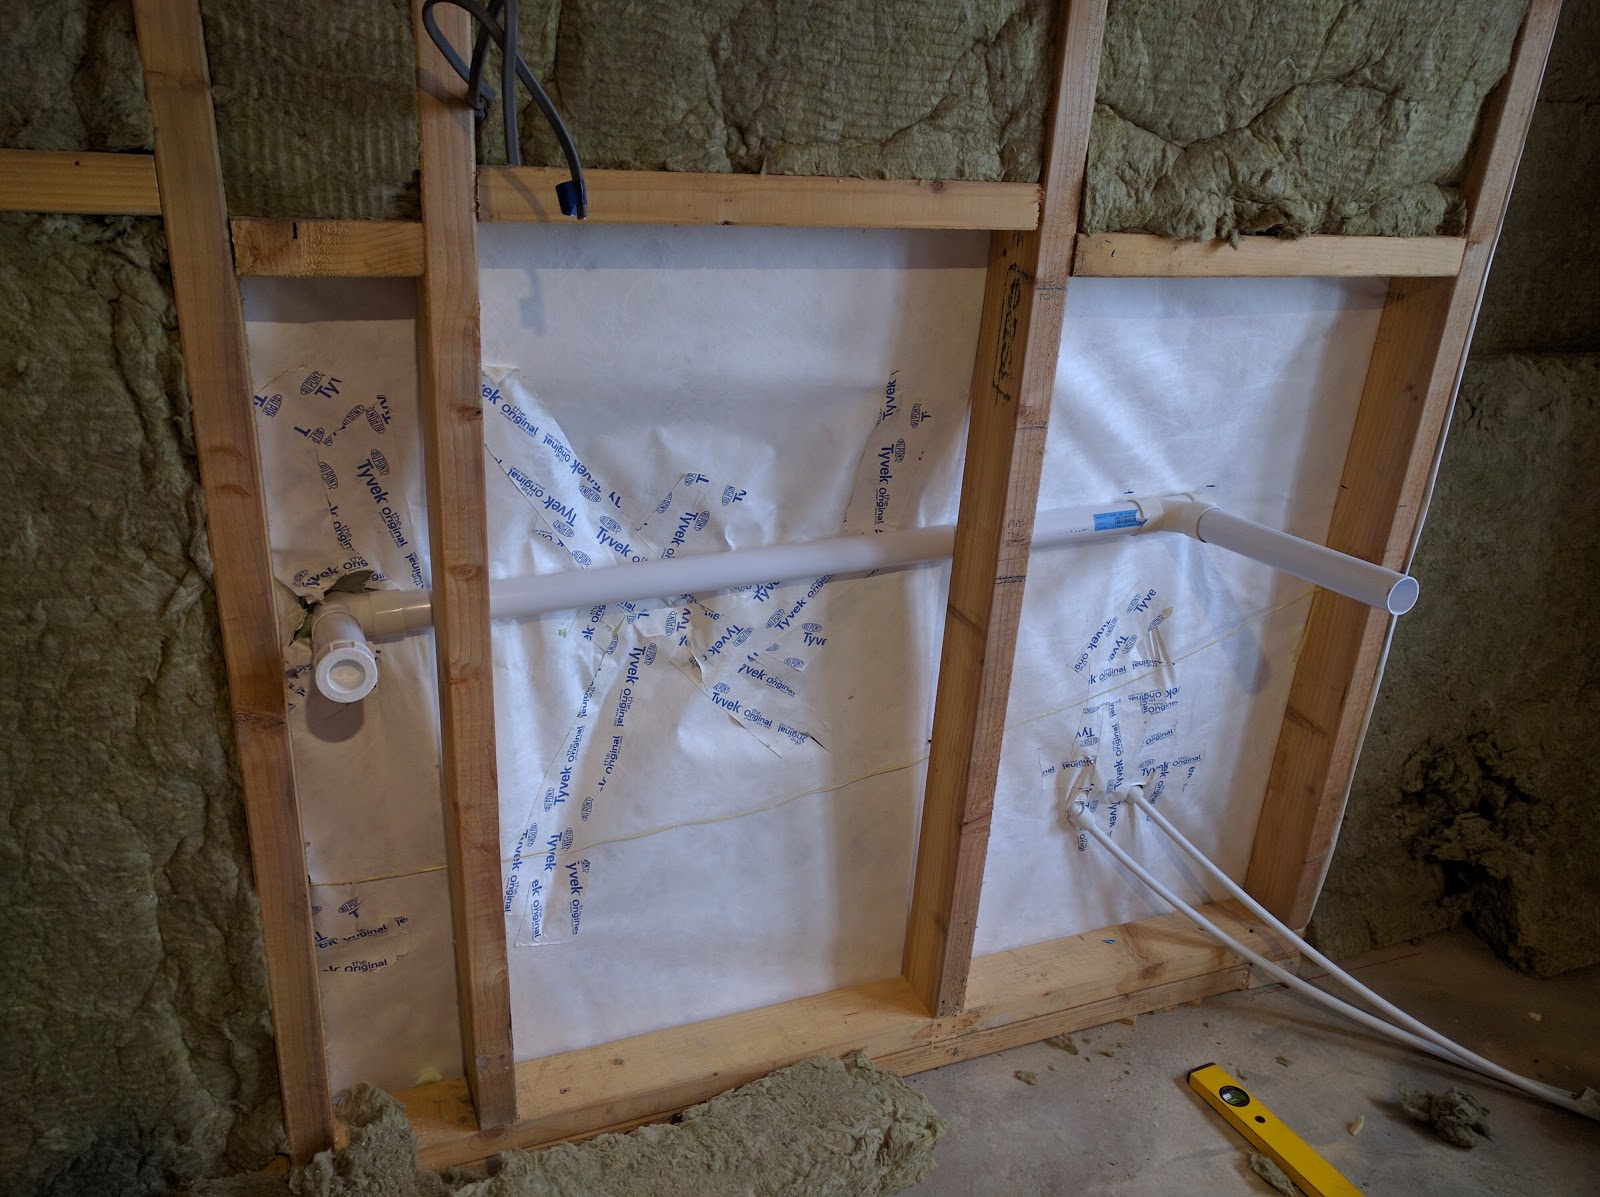
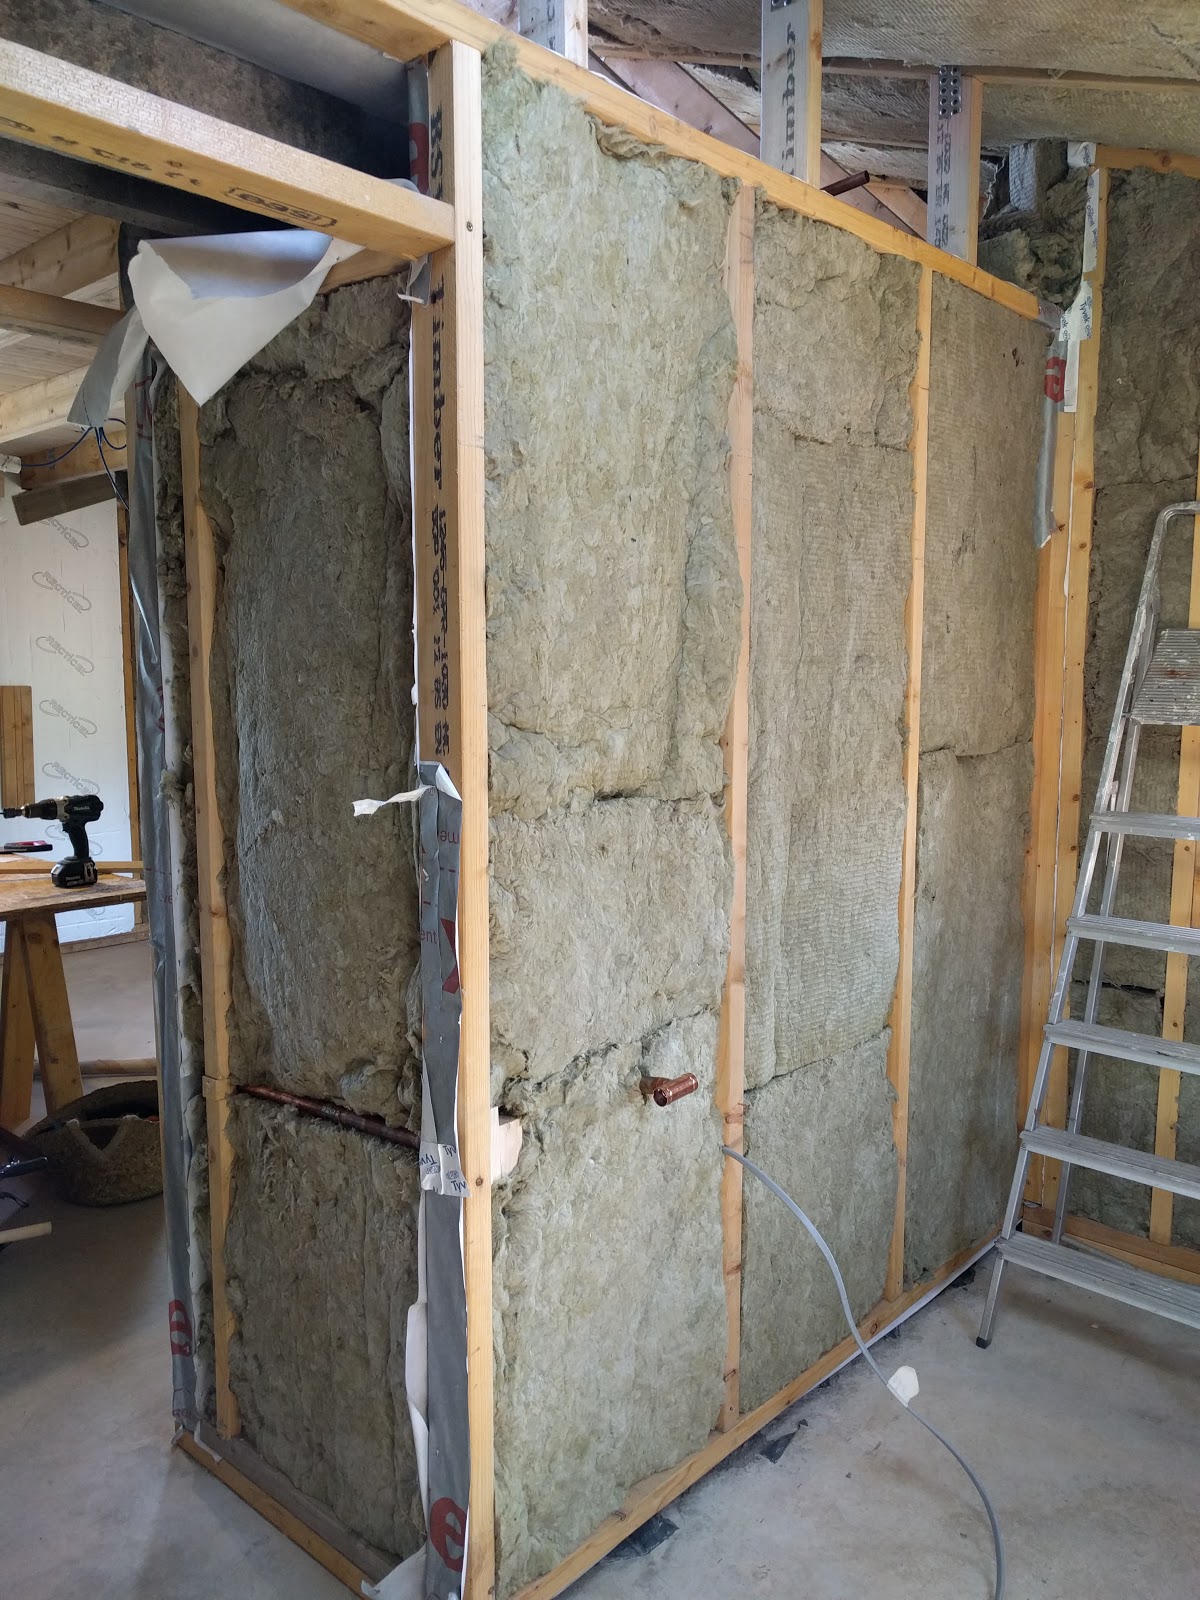
The space between the bathroom and the first floor also needed sealing up with PIR board which was very fiddly indeed.


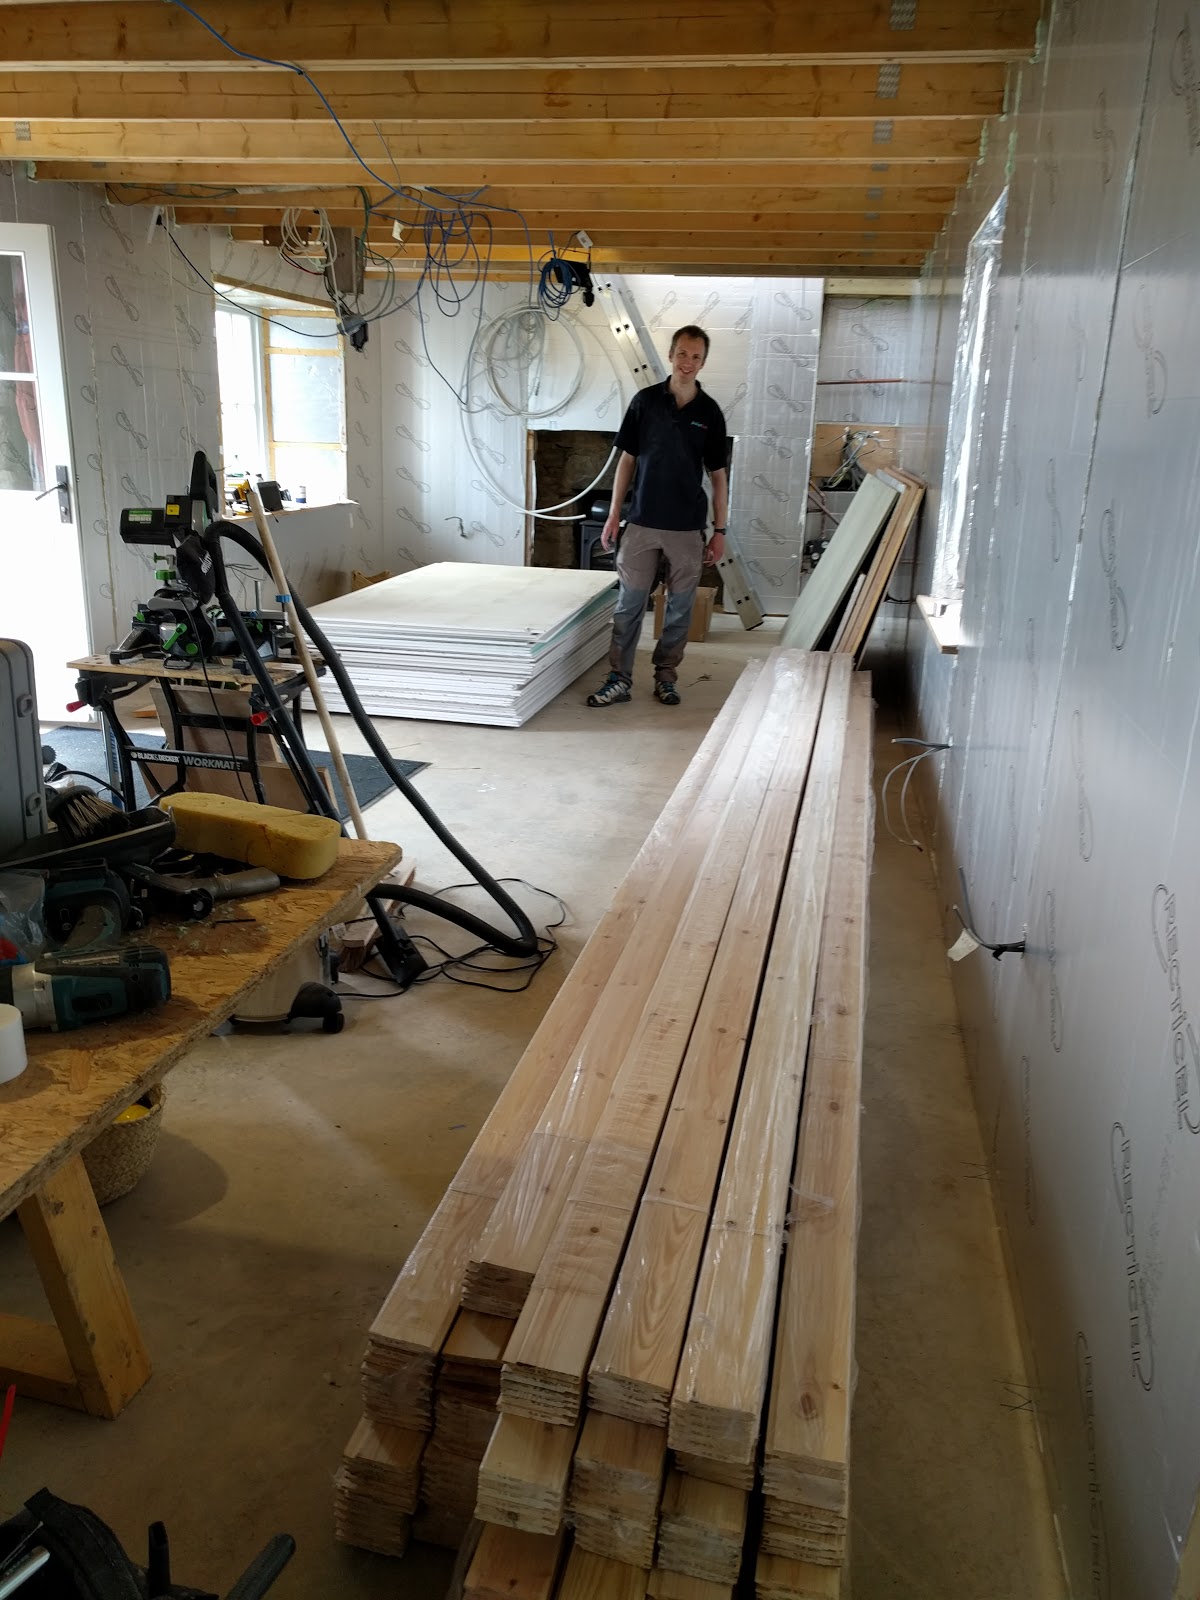
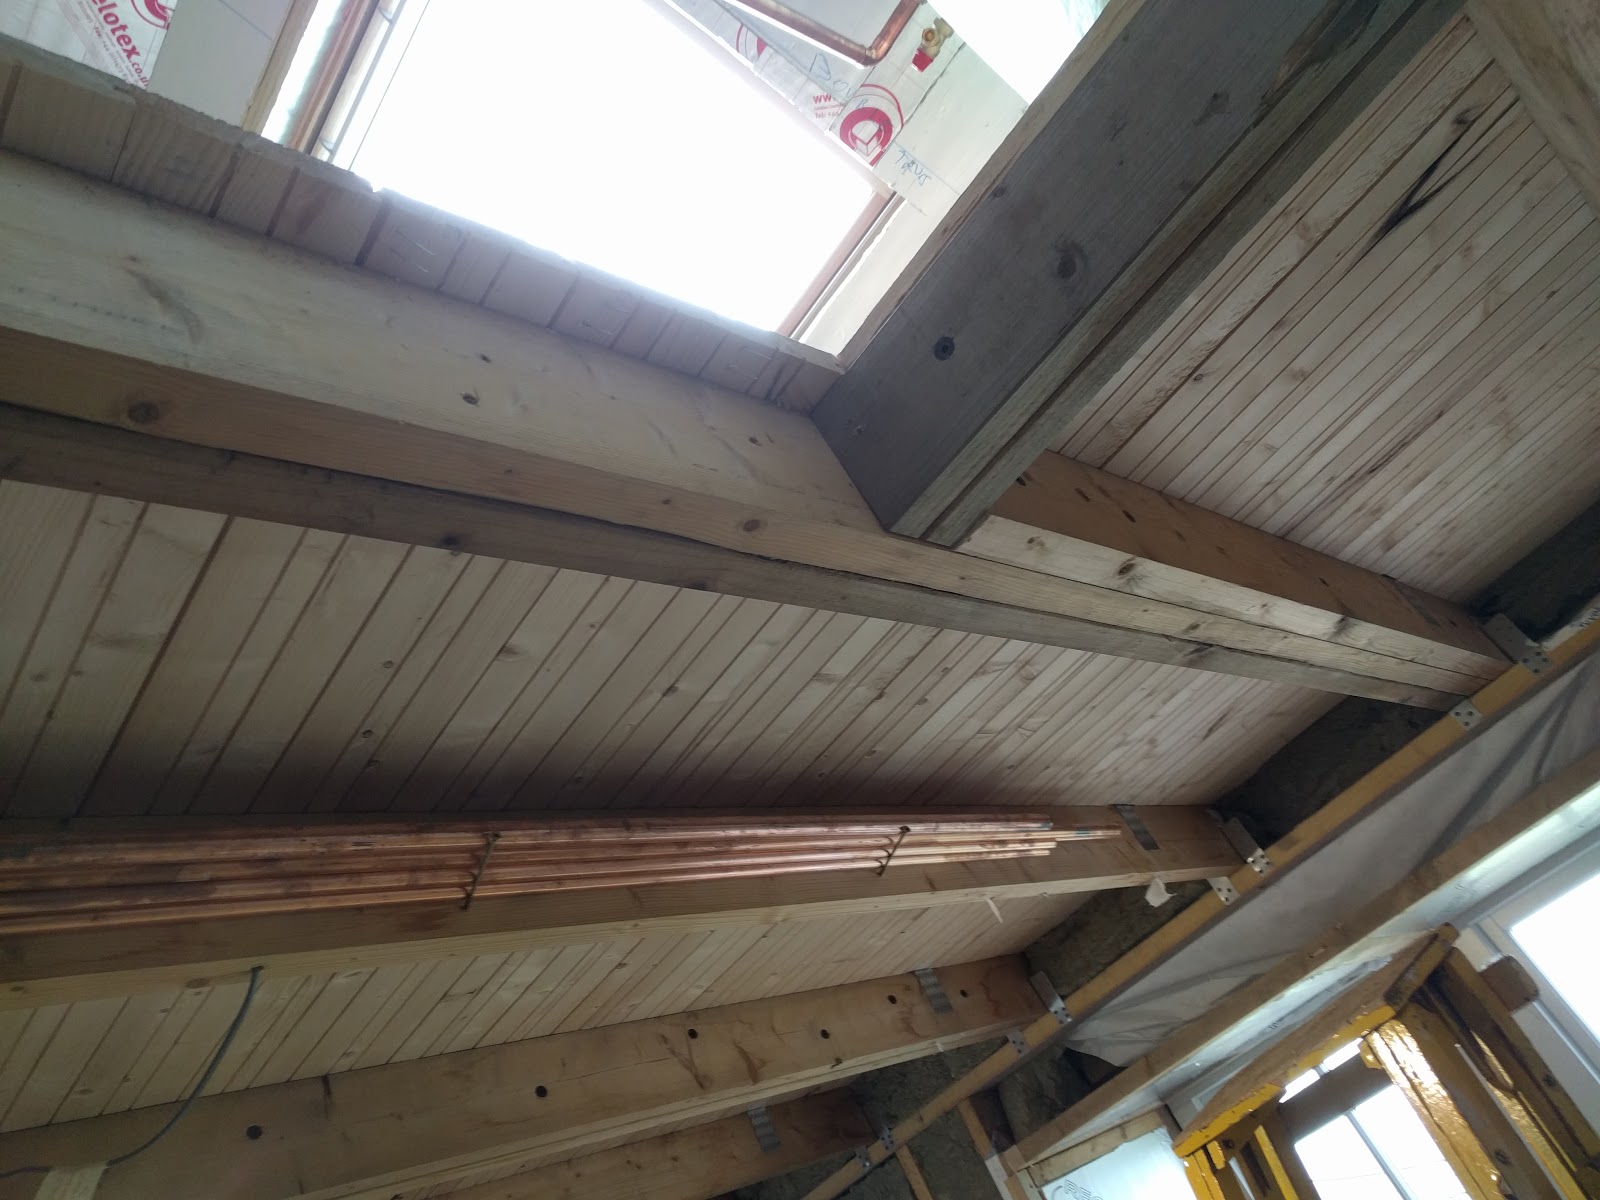
The delivery of the first of our internal finishes was exciting - 12mm whitewood pine cladding for the ceiling, standard plasterboard for the main room walls, moisture board for the bathroom and tilebacker (waterproof plasterboard) for the shower area. Thankfully Simon was on hand to get it from the road to the cottage, no mean feat at 25kg/board.


18 Jun 2016

Tim Peake is Back Day

Well if Tim Peake could make it all the way back from space to Earth then Jaimin thought he'd better crack on. Lots to update as it has been a busy week so far, with Sunday still to come.

First up was fitting the 40mm solvent weld waste pipe behind the stud wall for the kitchen sink and dishwasher. The left hand side has a rodding point in case the pipe going through the wall ever gets blocked.


Next was connecting the bathroom sink waste pipe to the shower outlet using a "strap boss". This required much more faff than expected including chisels, files, the Get Out of Jail Free oscillating multi tool and a hole saw. Eventually it was slipped into place and the white waste pipe connected. The end result is better than planned, because we had thought we would be running the lateral waste pipe inside the stud frame and therefore would have to build a box  to hide it in the shower. We can now avoid that, so we have a bigger shower.


Next up was completing 90% (this number is perpetual) of the insulation, which means the house is virtually a space ship on the inside. Still the upstairs eaves to go, which is a pain, but then we are done. Photos to come...  here is a taster.


Finally, the last bits of copper were cut to size and put in place, meaning the thermal store and plumbing is - sorry - 90% done. There remains significant solder work and then the creation of the copper heat leak radiator although this is later on.

The web of copper.
The black box is the PHE - PLate Heat Exchanger. Green pump is activated by a flow switch and sends the hot water to the taps. The red pump circulated the radiator circuit. 2 pumps, 1 radiator... ridiculous.
The only bit of 15mm copper on site is for the TPRV (Temp & Pressure Relief Valve). This tees in to the overflow at the back.
The hot/cold water & the CH flow/return are circulated in Hep2O.
A great motivator today was Lucy and the children visiting site. Eila & Finn stayed back in the evening as it was nice weather, and they even did their own brilliant building project! Inspired...!?


Black eye is a pirate patch :-)


13 Jun 2016

28mm Copper, More insulation

Having got the TS in place, it was time to work out how the pipework would fit (if it would fit) and where the F&E tank would go. This was not too bad in the end but required some destruction of gable insulation and rafter insulation in order to fit some shelf brackets and also fit the tank in place.

After the shelves were fitted with an extra noggin in the gable end, the F&E tank could take its seat.
Then it was on to bringing the 28mm copper from the woodburner to the TS.  This was already partially complete and really just needed a few more sections of pipe.


There is still some more copper to install, for all the other connections (hot water etc). Then the wall will need to be built around the TS and a door made as well.

Jaimin also installed a full length joist across the ground floor ceiling at the stariwell, as it looks much more properer. It's the slightly darker one parallel to the copper pipes...


Also the window reveal insulation is complete, and the ceiling of the bathroom is also insulated. This just leaves the bathroom walls, kitchen walls and some odds and ends to be insulated with PIR board before we can install finishing covers.

10 Jun 2016

Thermal store upstairs

Tressle Tom stopped by again last night on his way home from work to lend a muscle. Builder Ben also kindly came over because hauling the thermal store up the ladder was going to be a 3 man job.

Jaimin's main concern was that the TS would not fit in place as planned. Although it does (good news) the placement of the F&E tank is going to be tricky. It will work (it has to!) but not without a fiddle.

The TS in all its glory, with dial gauge, TPRV and HiLimit Autostat

8 Jun 2016

Well. For stairs, that is...

Insulation boarding has been ongoing, and upstairs is complete apart from fiddly bits around windows. Downstairs has started in earnest.


More exciting is that we took delivery of the much anticipated Thermal Store. This will keep water hot for 24 hours once it's heated by the stove.

Feed & expansion tank

Thermal store with plate heat exchanger


Even more exciting, and because the TS needs to go upstairs, we have cut out the joists ready for the staircase. This was done with a bit of head scratching and some help from Thomas (aka Tressle Tom) who had some good ideas and got things kicked off.

Tressle Tom with the first cut joist
Jaimin then set about noggining (or nogginging) the stair well.


Plenty to do before the stairs make an appearance but at least things are happening. 

4 Jun 2016

Hidden copper hidden, Rockwool rocked.

The past few days and today, Jaimin has managed to complete both hot and cold runs from the stove to the bathroom in 28mm copper, as well as finish the upstairs ceiling insulation and both gables with PIR board. The copper runs needed to be insulated, then clipped in place, and then the Tyvek patched up and finally rockwool installed.

In case it's unclear, when you install a stove with a back boiler, there is always the risk that it is left burning when all the water is already hot. In that case, temperature (and pressure) build up and if there was no vent would be a bomb. This system is vented, so steam / hot water will simply pour out, however you don't actually want any boiling going on so the best thing to do is to be able to cool down the water just a little, all the time. Sounds odd, but there is a good reason. This is the purpose of the bathroom radiator, and the 28mm copper pipe runs to and from the stove to the bathroom, which will be an "always on" heat-dump radiator to ensure the heat from the boiler is always able to be dissipated somewhere. It's nice to have it used in the bathroom, as we can use it as a towel rail/clothes dryer/bathroom heater...

Upstairs looking NASA-like 
Added a bit down stairs. Variety = spice of life... 


The T of copper in this image will be the bottom of our towel rail, where an immersion element can also be turned on to heat it in case the fire is not on.

The "kitchen radiator" has been assigned a spot... 
The next step is to make sure all the windows are noggined and ready to be insulated, then go heavy on the PIR board and turn the cottage in to a spaceship.