After a good build up of momentum, punctuated by James's solid input and (as mentioned in the last post) hiring a local joiner (Alastair Robertson) for the plasterboarding, we have completed a major phase.
The plasterboard is fitted and now needs taping:
The roof light surrounds took a long time to complete but are now done, as well as the final strips of cladding.
James worked hard to get the bathroom roof light surrounds as tidy as possible with a lovely outcome.
For anyone that has been wondering if we'd ceased operations, let's just say we've had a hiatus. July was taken up with work and August was taken up with the devastating and tragic loss of a close friend, Ben Abrahams, who featured on the blog a good few times.
Though it seems trivial, the work has kicked off again and progress is as follows:
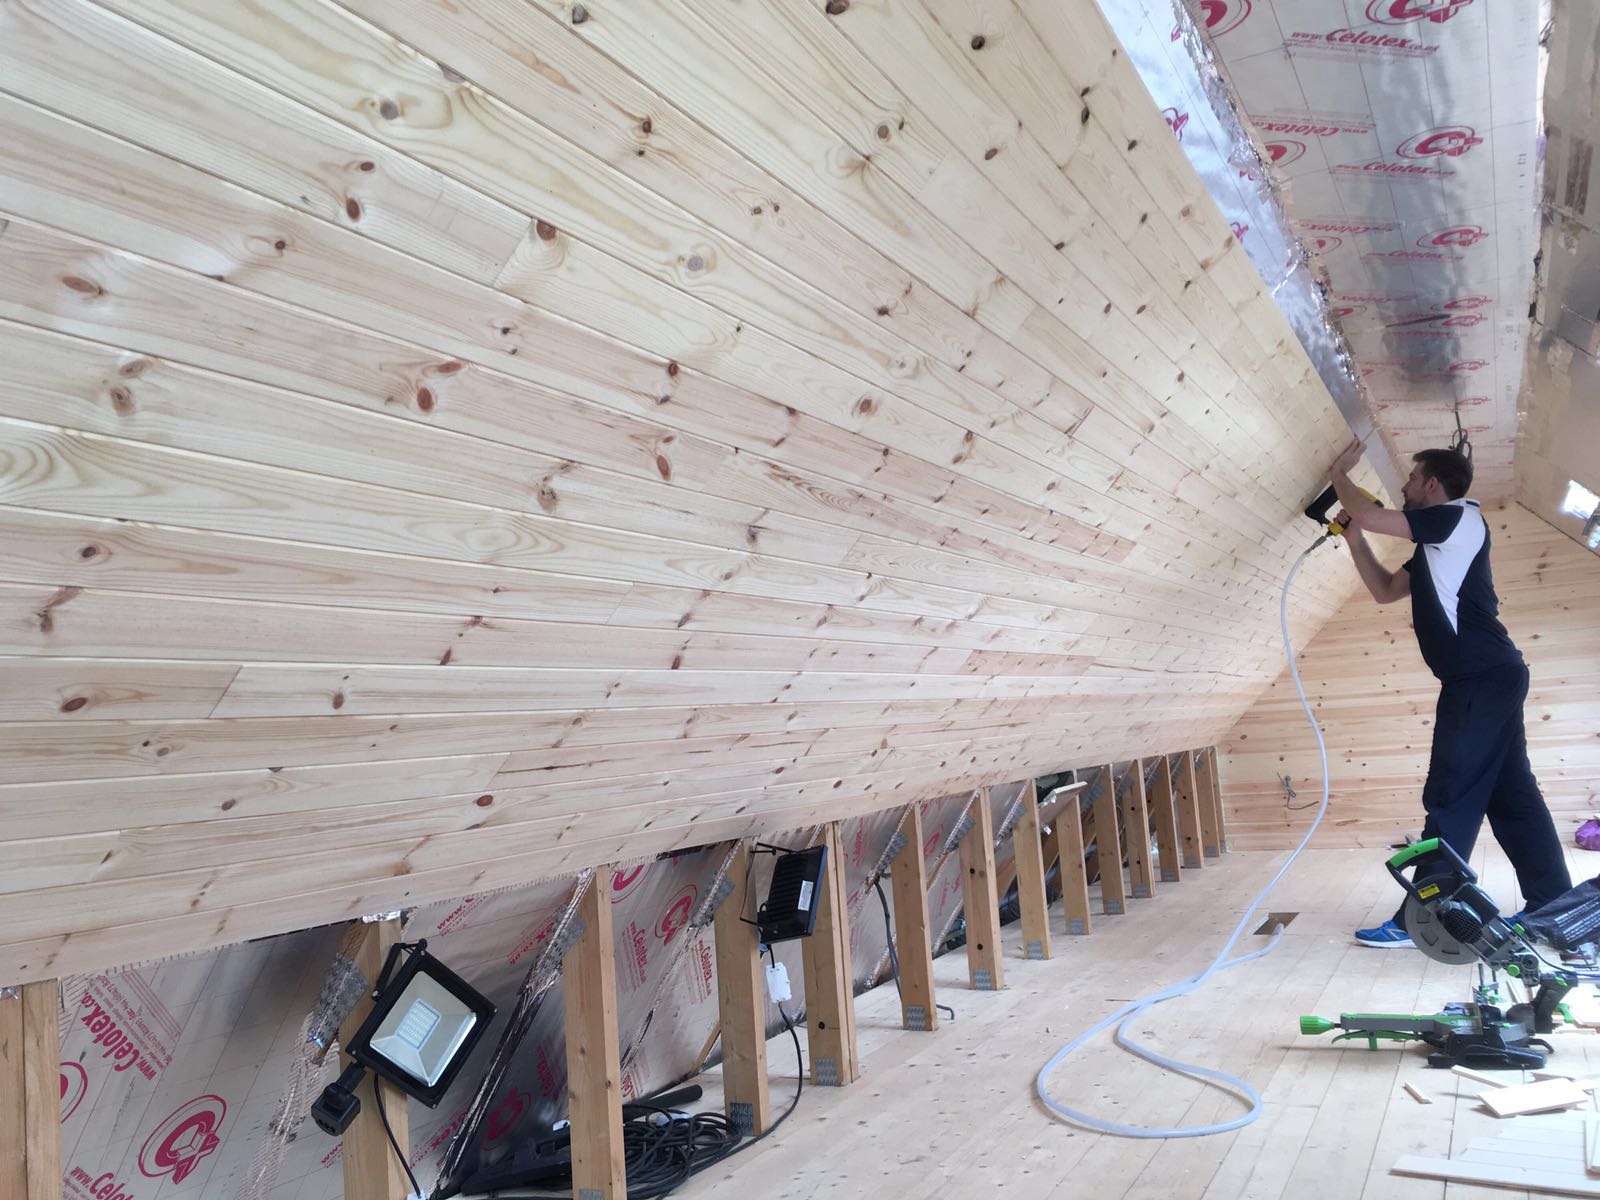
The ceiling cladding is 90% complete and only requires 2 strips to be ripped using a table saw to fill in 2 gaps - one above head height to close the ceiling up, and one on the south eaves. The north eaves are all done. The window reveals also need to be done, but again table saw will sort that fairly quickly we hope. Rockwool was placed in between the bathroom boxes and the cladding as soundproofing.
Above the stairs. Some boxing in required but not much.
The bathroom boxes and the south side of the bathroom are complete, fixed and faced, and plasterboard has been fitted to the same wall. The yellow/cream board is Tilebacker (waterproof) and the blue is Moisture Resistant.
We have got a joiner in to help out and speed up (and improve the quality of) the plasterboarding, and he is making good progress:
James and Jaimin also cut out new MDF resistant windowsills for the bathroom, as they will last longer than the planned plywood ones.
Next up we need to finish the ceiling cladding completely, and once the plasterboarding is done, internally anyway it will be on to priming for paint.
This update is a combination of 2, as it's been a while. Sorry about that - things have been a bit busy.
The ongoing job at the moment is plasterboarding and ceiling cladding. With the help of James, and a new helper on site -Phil of Foot'Dee, we managed to complete the bathroom ceiling. While James & Phil were doing that, Jaimin was sealing up the chimney register plate with fire cement.
Phil nailing the ceiling cladding in the bathroom.
That meant we could move up to the upstairs room. The length and flexibility of the boards made this a 3 man job at first, until we had worked out a suitable system of glue, nails, sliding grooves in to tongues and so on.
Jaimin had to head offshore, so a special mention goes out to the indefatigable James, who along with another newcomer to site - Gavin - paired up on Sunday to continue the ceiling cladding.
Such a generous offer and so highly appreciated.
In the intervening week, Jaimin spent a few evenings making the boxes out of 9mm and 12mm plywood that will sit in the bathroom alcove and provide some storage (towels, linen??).
Here is a timelapse of one of the boxes being created.
Since then, Jaimin carried out the first west test on the plumbing system. Before the water could be used, there were far too many attempts at one particular 28mm T, which simply wouldn't seal. After literally hours of effort, it was sorted on Friday.
The wet tests were otherwise successful apart from one connection which is not compression or solder, and therefore not a concern and needs to be worked out... No biggie. Plumbing success then!
The wood burner has been hooked up and is waiting smoke pellets for the smoke test, but passed the wet test.
Today the plastetboard began with a little more vigour, starting in the bathroom. Cream is "aquapanel" or "tilebacker" (waterproof), and blue is moisture board (moisture resistant).
Also the view- if you'll allow us - kicked ass on Friday night, Here it is.
The end of last week and the weekend were spent filling gaps with expanding foam and then sealing with foil tape.
Also, almost year later and Eila & Finn celebrated their last day of P3 and P1...
An exciting development at the weekend was the installation of the first cladding on Saturday on the West gable end, and then our friends from Houston were visiting so Matt made himself very useful and helped Jaimin to install the same on the East gable.
The stove needed to have its own thermostat installed, which though uncomplicated was another pending item to tick off.
Jaimin has spent more time on insulation and is close to completing the PIR boards (taping is underway), with Simon's help thrown in sporadically. The internal eaves (roof coombes?) each needed boards cut to size with noggings installed to bear the cladding which will cover them.
The space between the bathroom and the first floor also needed sealing up with PIR board which was very fiddly indeed.
The delivery of the first of our internal finishes was exciting - 12mm whitewood pine cladding for the ceiling, standard plasterboard for the main room walls, moisture board for the bathroom and tilebacker (waterproof plasterboard) for the shower area. Thankfully Simon was on hand to get it from the road to the cottage, no mean feat at 25kg/board.
Well if Tim Peake could make it all the way back from space to Earth then Jaimin thought he'd better crack on. Lots to update as it has been a busy week so far, with Sunday still to come.
First up was fitting the 40mm solvent weld waste pipe behind the stud wall for the kitchen sink and dishwasher. The left hand side has a rodding point in case the pipe going through the wall ever gets blocked.
Next was connecting the bathroom sink waste pipe to the shower outlet using a "strap boss". This required much more faff than expected including chisels, files, the Get Out of Jail Free oscillating multi tool and a hole saw. Eventually it was slipped into place and the white waste pipe connected. The end result is better than planned, because we had thought we would be running the lateral waste pipe inside the stud frame and therefore would have to build a box to hide it in the shower. We can now avoid that, so we have a bigger shower.
Next up was completing 90% (this number is perpetual) of the insulation, which means the house is virtually a space ship on the inside. Still the upstairs eaves to go, which is a pain, but then we are done. Photos to come... here is a taster.
Finally, the last bits of copper were cut to size and put in place, meaning the thermal store and plumbing is - sorry - 90% done. There remains significant solder work and then the creation of the copper heat leak radiator although this is later on.
The web of copper.
The black box is the PHE - PLate Heat Exchanger. Green pump is activated by a flow switch and sends the hot water to the taps. The red pump circulated the radiator circuit. 2 pumps, 1 radiator... ridiculous.
The only bit of 15mm copper on site is for the TPRV (Temp & Pressure Relief Valve). This tees in to the overflow at the back.
The hot/cold water & the CH flow/return are circulated in Hep2O.
A great motivator today was Lucy and the children visiting site. Eila & Finn stayed back in the evening as it was nice weather, and they even did their own brilliant building project! Inspired...!?