Saturday was a washout!
Sunday proved more pleasant so Jaimin started by trying to work out how best to fit the gutter brackets to the north side roof. The have to be in place and underneath timber if possible, so that the first course of slates can be done more smoothly.
The cottage walls have a build up on their outside extremity which is higher than the level of the joist. This means that the rafters & normal sarking boards do not project to the edge of the top of the wall-head as you would normally have them do. The consequence is that another piece of sarking is required to "kick out" over the wall edge, but at a lower angle, to enable slate coverage. This low angle board, I am told, is a bell board and I am using that term. However the gutter brackets have to be underneath this board, and so it needed a bit of tinkering and working out...
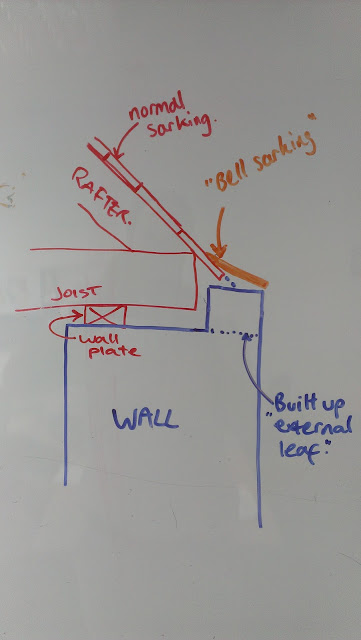
The brackets are at their own angle again, and although moderately malleable are not very bendy, so the first idea of "making them fit" wasn't working. The next idea was to nail the brackets to the underside of the bell-board and then fit the board in place. The bracket to wall distance dictated that the bell board could accommodate 2 out of 3 of the bracket's holes, which was ok until the 3rd hole (which extended out the top of the bell-board) was fixed to the normal sarking, and then it pulled the other 2 nails, on the opposite side of the board, out. A quandary.
 |
| First attempt - no luck, as the nails pulled out |
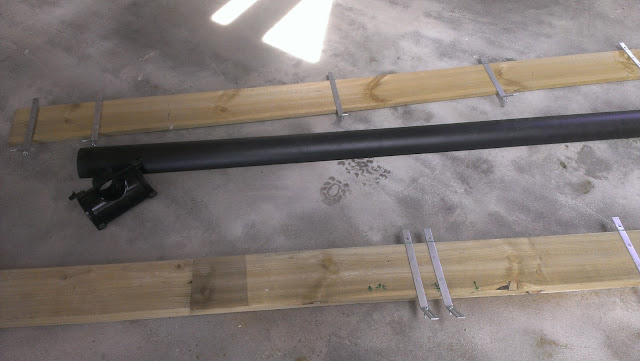
Solution: Use square twist nails which grip well.
Problem: 18mm board and 30mm nails.
Solution: install a slice of 8mm C16 between the board and bracket
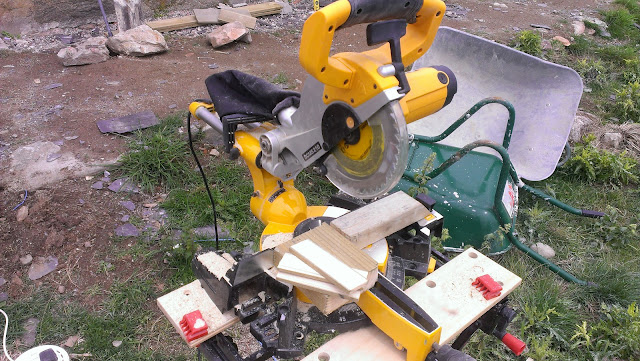
Problem: need to mitre (cut) with the wood grain, not across it
Solution (sort of): make a spacer jig to keep hands and wood safe. Then cut spacers.
 |
| Slicing up the spacers |
Result:
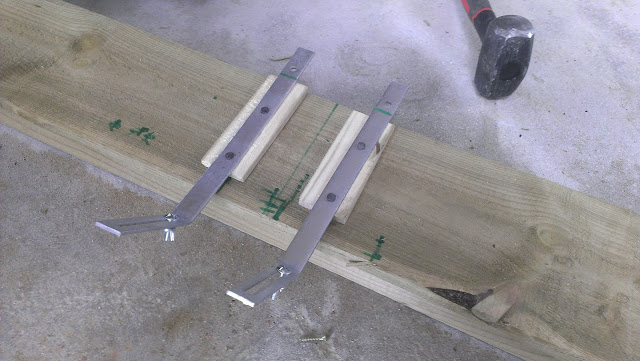 |
| Better. Spaced and fixed with square twisters. |
Once all the joins and downpipe brackets were measured to be in place, finally the board was installed and although not ideal, should be functionally ok. You can hardly see the "kick" in this photo but it is there!
The after-lunch job was to cement up the south facing wall head which went fine after the 204v live cable was tenderly re-located, and means that the south facing bell-sarking is next before we can finally approach the membrane!


