Pages

31 May 2016

More copper, gable insulation

Jaimin has been setting out and soldering copper connections for the heat leak (bathroom) radiator. Having never soldered let alone solder water pipes, this involved a YouTube training course which seems to have paid off.

The cold run is complete, and most of the hot run is done, leaving a non return valve and then the actual radiator to be done. The hot connection to the wood burner also remains, as well as the pipes to the thermal store.

Cold return from the bathroom back to the stove
Cold return at the stove; hot flow not complete.
On Sunday, Simon came to help, and cut the 25mm PIR to size for the west gable wall. They then installed some more ceiling 20mm boards.

Tonight Jaimin made up some noggins to frame the east gable and insulated it as well.

27 May 2016

Chimney adaptor, first copper, sink pipes.

Yesterday Jaimin managed to spend some time with Ollie in the evening, and designed an outline plan for the heat leak radiator copper pipe runs. Following some Youtube tutorship, the first copper connections were made, and then the pipe was passed behind the stud and clipped in to place with a constant rise, as it will be a gravity driven circuit.


The local blacksmith was called upon to build a rough and ready flue adapter to go from the 6" stainless steel flexi flue to the main chimney, which will enable the bypassing of the void space above the stove. This will hopefully improve the draw and also eliminate the need to heat a void of cold air. This needs to be fitted before the stove goes in.


Once Ollie left, Jaimin did some easy Hep2O connections to bring the kitchen sink and bathroom basin pipe out through the walls.


25 May 2016

Progress with odds & ends; Stove delivery

Progress has been good but a bit "all over the place" depending on what takes ones fancy at any time and also who may be on hand to offer assistance.

Rockwool has been installed in the overhead space in the bathroom (commonly referred to as a ceiling, but emphasis placed on the overhead-ness due to the clouds of itchy rockwool that cascade on to the installer during the fitting). 

 
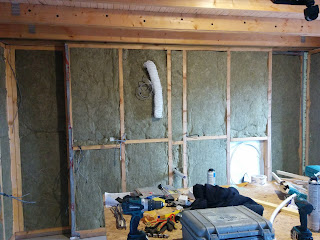
 Some sections of wall have not yet been Rockwooled, because they have "something" coming in from behind the wall - a pipe, a duct etc. In the kitchen and bathroom there is a duct for the extractor fans. These are now fitted....

For the kitchen, the kitchen waste pipe also needed installing. During the capping of the chimney, a lot of jackdaw nest was pushed to the fireplace and this needed to be cleared out, as it was damp, wet and dirty (and stank). So a hole was made in the lovely Tyvek and the insulation board behind it, and the muck tidied out.


Then the kitchen waste pipe and duct were installed and taped in place, with rockwool following:

Kitchen waste pipe heading to the outside through the old fireplace. 


The bathroom duct was easier and then the rockwool was installed. The 15mm Hep2o was also tee'd in to the 22mm Feed/Hot water circuit. That is the coil of white pipe in the picture below. 


Perhaps more than anything worth mentioning and after literally months and days of deliberation and calculation, and agonising over all sorts of figures, we purchased and took delivery of our brand new Stovax Stockton 8HB Multi-Fuel Boiler Stove. This has 5kW output to the room and 8kW(!) to water, which we are looking forward to firing up once all the pipe work is installed. At 140kg it was no mean feat to get it in to the house but luckily we had Lucy and the helpful delivery man Derrick on hand to assist.


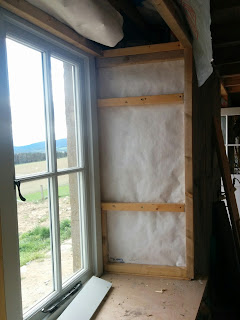
There is a lot of "nogginging" - putting bits of wood for screws to be screwed in to and fix plasterboard - to be done in places such as around the windows. This was much of Saturday's work .
Ollie was on hand to help out and this also meant a bit more of the roof spare insulation could be fitted.


Yesterday Jaimin did a pressure test to 3 bar on all the plastic runs of Hep2O which were all good and mean there are no leaks in the system at this stage.


16 May 2016

Commence the Insulating & Make the Hearth thing

Insulating the rafters with 140mm rockwool and the stud walls with 100mm rockwool is a fairly straightforward but itchy process. Jaimin proceeded with this as much as possible.


 James' appearance on the scene helped significantly and he managed to lay the fireplace hearth stones (black limestone garden paving stones from B&Q no less) which had to be sized with a circular saw. Though it chewed the blade it was an effective method.


The day was also "capped" by Jaimin scaling the roofing ladder and clearing out, then rodding, and finally sealing the kitchen end chimney with an improvised cap of 2 slates and mortar. This was not a fun job.


Finally James and Jaimin improvised a method of attaching the PIR board to the rafters with grab adhesive (based on sound experience and advice from Thomas) - and used some prop boards to help set them in place.


"Springing" in to action

To all our readers, sorry for the delay in updating the blog recently. Excuses aside, you should now expect regular updates... This post will hopefully bring you back to the present!

We finally received Building Warrant Approval in April. This is really excellent news as it legitimizes all the work so far and the work we plan to do.

The major change we had to accept is that the upstairs area cannot be officially classed as living space, due to "activity space restrictions" and therefore has to be classed as a "storage loft". We still plan to make it fully accessible by a staircase, and ensure it's a nice space for all the storage...

On the progress front, we had a Hatton Garden style drilling man (with an awesome Hilti core drill) come and drill some holes in the granite where we will fit extractor fans, 40mm kitchen waste pipes and vents.


 Jaimin has spent lots of fiddly time getting the eaves water tight and as wind proof as possible using tape and a membrane. This was taped to the rafters, the top rail of the stud frame, and the underside of the sarking. See below - the white sheets in the eaves photo..

He then tackled the flooring in the eaves, (also below) which were also fiddly. This is probably going to be an overused term when talking about the eaves.  This was done on both sides, obviously.

Eaves floored all the way to the cantilever post.
One of the tricky things was to cut (or "rip") along the length of the boards which were just too wide to fit in the final slot in the eaves. Here is a geeky related video which Jaimin made (sado) on his own when he was "building":


The next job was to comply with the structural drawing by inserting some vertical posts under the bathroom rafters - seen below.

No roof falling in on your head in this bathroom.
The electrician has done a survey and identified that everything was in order except for one missing feed wire, which we ran. Everything else is ready to go apart from the plumbing which is on the list. So - enough was put in place for the next stage of: insulating.