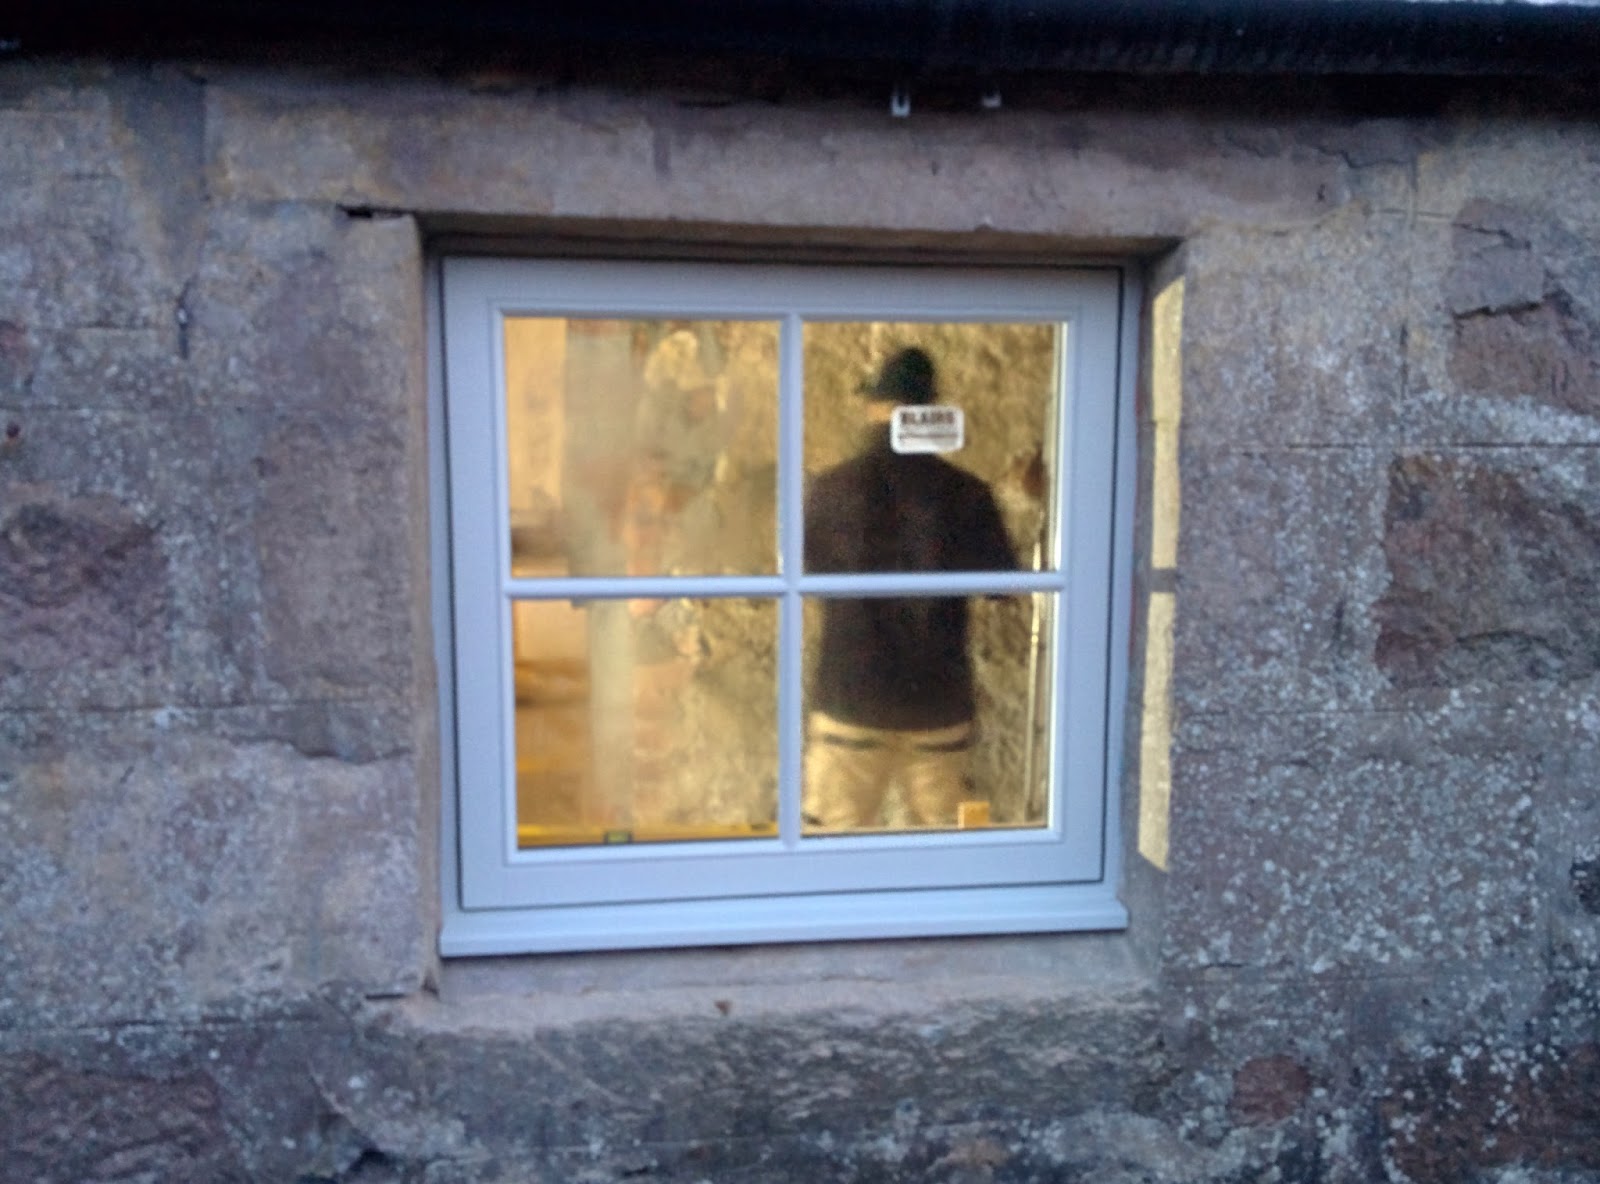
The latest episode was to measure out, cut sills, square up and put in place (not "install", yet) the east front main room window. This is the "least good" front window, with the other one (west) being fairly intact with no broken panes.
The windows were supplied in 2 separate casements, requiring us to install our own mullion as well as make the frames "read" well against the stone (basically, make them look good/normal/proper, with even borders from an outside perspective). The mullion was, quite by chance and again by a stroke of luck, the width of a 2 x 4 and the depth of two 2 x 4's ... Wow.
Here are some nicer daylight images of the bathroom windows.
Construction of the bathroom frames continued last night. Both east and west frames were fixed in place having been Tyvek'd, and the south wall also framed but not yet fitted with membrane. The time lapse below shows the south frame, we had to move the camera half way through hence the change in perspective.
On Thursday Bumpy and Dodo arrived, with Bumpy preparing to help Jaimin as much as he could.
The priority list has been established as windows, door, electrics and plumbing.
On Saturday they managed to fit the main room north window and set in place the bathroom north window, as well as work out the door plan. The door is a really tight fit and we needed Thomas's SDS to fix it to the granite blocks. Here it is being ceremoniously unveiled.
Bumpy chipped away all the concrete around the front door revealing a lovely old granite stone door step. The door was installed with 7 hammer-in fixings , 8 x 120 mm (4 on the hinged side).
To fit the windows, frames were needed which were measured and built from 2 x 2 treated timber. The windows were fixed in place using 100mm or 120mm x 8mm hammer fixings, as well as being screwed to the timber frames.
Main room north, inside view
Main room north, outside view
We unpack the window, set it against the wall opening and get it positioned. All the window drip sills needed to be cut to size which was done using the oscillating multi tool. The window is then propped up again, this time slotting nicely in the gap, and DPC laid underneath it. The timber frame is measured out then made, the window is fixed to that, and the frame fixed to the stonework with hammer-in fixings.
Preparing the sill on the bathroom north window
Bathroom north installed. The one with the wonky lintel...
On Sunday we finished installing the door, with Bumpy mortaring the gap around the edge.
Once the the windows were in place it was time to address the very worrying 2 remaining internal lintels, above the east and west bathroom window openings. At first we thought this could be a disaster but in fact, the stonework held well and it was a simple replacement job after clearing out the debris. We used 4 lengths of treated 2 x 6 C16 in each, as well as a 2 x 4 in the east one (along the front face above the window) and a piece of 2 x 2 in the west.
Jaimin shot the videos below on a new app which works pretty well!
A very foggy day saw the delivery of the new septic tank and 3200 litre water tank.
With no forklift on site (!) it was lucky that Travis Perkins was (by chance) available having just delivered a load of plywood and timber, so the driver helped us offload it with their Hi-Ab.
Hopefully these will be installed next week, pending farmer negotiations for the water tank...
Septic tank on left (green access ports); underground water tank on right.
As the title suggests, we're still framing, with the bathroom half complete.
For the north wall of the bathroom, the top rail of the frame needed to be square/level, so the sloping rafters had to be cut with a birds-mouth cut. This was tricky with the saw, so Jaimin used the Oscillating Multi Tool which he was gifted for his birthday. It was a good tool for the job, as it was easily controlled and made clean cuts.
The side walls have both been cut out, one has been assembled and Tyvek'd, the other one is yet to be assembled.
Today, Annabelle, Emma and Simon lent a hand again. 3 main things were achieved.
Jaimin positioned and fixed in place all the wall frames, by screwing through the top rail in to the underside of the joists. This meant Simon could go ahead and install framing anchors along as much of the north and south frames as possible, connecting the wall boxes (frames) to the joists, which are the bottom chord of the trusses, and therefore the roof. Simon completed the north wall and half the south wall:
Perhaps not his best look...
Jaimin prepared and installed the resin anchors, at approximately 1.2m intervals along the north and south walls. This was done by cutting the galvansied threaded rods with a hacksaw, to 225mm lengths. One end was pointy (cut at an angle) and the other square. 225mm was (110mm for the anchor + 90mm for the sole plate + bottom rail depth + 25mm for the washer & nut).
The sole plate and bottom rail were drilled using an auger bit, which was then opened up with a boring spade (a type of drill bit), then the SDS was on hand to get through the subfloor to 115mm.
The hole was then blown out with 100psi air from the compressor, repeatedly. Once "clean" to as best we could get it, the resin anchor capsule was dropped in to place, followed by the threaded rod, washer and nut. A lot of them needed a little encouragement to get in to the hole, and smash the resin capsule which releases the epoxies and starts to harden. We will know tomorrow if this has been successful.
Since mid week the theme has remained the same, framing. But a few things are worth mentioning. The large fireplace has been propped up with a post to hold up any dodgy breeze blocks, and 100mm PIR board has been installed to keep the draft and cold air out, with foam to fill the gaps.
First off, the fiddly "alcove corners" have been a real pain to assemble and size, but they are now done apart from one teeny bit in the SE corner which should only need 1 upright. We've also sussed the corner detail which, as easy as it is and easy as it looks, was one of those concepts that took a while; it just did.
Corner detail
North east corner of the kitchen. Built and ready to fit (with help).
There's been a bit more Tyveking,so the east frame is covered.
East wall Tyvek'd
The north frame wall is done and fixed to the joists (ready to anchor). The meter tails (mains electrical wires) are also in place and ready to hook up to the consumer unit.
Wires peeping through...
The Tyvek has also been cut out of the window openings, which is a minor change but adds to the feel.