Pages

18 Oct 2015

Framing + Resin Anchors

Today, Annabelle, Emma and Simon lent a hand again. 3 main things were achieved.
Jaimin positioned and fixed in place all the wall frames, by screwing through the top rail in to the underside of the joists. This meant Simon could go ahead and install framing anchors along as much of the north and south frames as possible, connecting the wall boxes (frames) to the joists, which are the bottom chord of the trusses, and therefore the roof. Simon completed the north wall and half the south wall:


Perhaps not his best look...
Jaimin prepared and installed the resin anchors, at approximately 1.2m intervals along the north and south walls. This was done by cutting the galvansied threaded rods with a hacksaw, to 225mm lengths. One end was pointy (cut at an angle) and the other square. 225mm was (110mm for the anchor + 90mm for the sole plate + bottom rail depth + 25mm for the washer & nut).

The sole plate and bottom rail were drilled using an auger bit, which was then opened up with a boring spade (a type of drill bit), then the SDS was on hand to get through the subfloor to 115mm.

The hole was then blown out with 100psi air from the compressor, repeatedly. Once "clean" to as best we could get it, the resin anchor capsule was dropped in to place, followed by the threaded rod, washer and nut. A lot of them needed a little encouragement to get in to the hole, and smash the resin capsule which releases the epoxies and starts to harden. We will know tomorrow if this has been successful.


17 Oct 2015

More framing

Since mid week the theme has remained the same, framing. But a few things are worth mentioning. The large fireplace has been propped up with a post to hold up any dodgy breeze blocks, and 100mm PIR board has been installed to keep the draft and cold air out, with foam to fill the gaps.


First off, the fiddly "alcove corners" have been a real pain to assemble and size, but they are now done apart from one teeny bit in the SE corner which should only need 1 upright. We've also sussed the corner detail which, as easy as it is and easy as it looks, was one of those concepts that took a while; it just did.

Corner detail


North east corner of the kitchen. Built and ready to fit (with help).
There's been a bit more Tyveking,so the east frame is covered.
East wall Tyvek'd
The north frame wall is done and fixed to the joists (ready to anchor). The meter tails (mains electrical wires) are also in place and ready to hook up to the consumer unit.

Wires peeping through... 
The Tyvek has also been cut out of the window openings, which is a minor change but adds to the feel.


16 Oct 2015

The big wall

Last night Simon kindly came over after work, and together he and Jaimin managed to construct, Tyvek and nail plate the whole of the "long north wall". It's now been erected and temporarily fixed.
The west wall was also Tvvek'd leaving the east wall to be done, as well as a few fiddly corners, upstairs and the bathroom.

Builders bum again.; sorry. West wall Tyvek.
Half the north wall frame
Nail plating
The north wall frame, half Tyvek'd.

North wall being fixed temporarily. more bums, it seems.
The long north wall in place. 

14 Oct 2015

Framing continues

Here is the progress after the weekend, with Jaimin visiting the site in the evenings to get some timber construction done: None of it is yet installed, the bare frames have to come down and be Tyvek'd and nail plated, then the whole lot will be anchored in one go...


12 Oct 2015

Starting the timber frame

This weekend was spent using the new Stanley Crossline 90 laser, preparing for the installation of the sole plate, and the wall boxes to frame the inside. Because the frame will be structural, it is a little more involved that simply cutting timber to size and fixing it.

In our case we are going to install nail plates at the junctions between the timbers, and attach the frames to the joists using framing anchors or truss clips, then fit resin anchors to tie the whole thing to the reinforced concrete slab.

On Saturday, Jaimin spent the morning spraying the inside for woodworm, as there is still residual wood in the bathroom lintels and in the walls from the old timber frame. Once it was sprayed he spent the afternoon arranging the layout of the new timber frame sole plate..

On Sunday, Simon reappeared on the project, but this time he was joined by the whole family - Emma included! It was nice for Jaimin to have some company, and help. It turned out to be a productive day but highlighted the inexperience of all of us, taking us lots of time and discussion to do things which are a tradesman's bread and butter. We all learned a lot though.

Here are a few photos of the progress we made. Basically we confirmed the rectangle using the laser, cut all the sole plate timbers and bottom rail timbers and marked out the stud (upright) positions.

Laying out the sole plate & bottom rail. (10 points if you can spot the laser).
Builders bum, marking out studs
We could then start on constructing one frame (the SE side). We laid it out, having cut all the timber, screwed it together, raised it to check for fit, made some adjustments, checked again, (repeat x 2), then nailed in the nail plates, fitted Tyvek Housewrap with staples, and raised it in to place. We didn't make the short "jack studs" that will hold up the window sill because we haven't actually worked out how tall they need to be. Another unknown...


Edmundson's in action!
Big moment - first frame in place
The Tyvek is a membrane to shed water that ingresses through the granite, and it provides a backing or holder for the insulation, to prevent it falling out of the frame on to the granite.

Once darkness fell and Emma needed to go home, Jaimin stayed back and using his new LED site lights managed to construct one more wall box and even raise it in to place to check for fit. It needs to come down and have the nail plate/Tyvel treatment before being fixed permanently.


Second frame - SW wall.


Downpipes & tap

During the week last week, Jaimin spent a few evenings tinkering with drainage and water, managing to install 2 of the downpipes, and fit a temporary garden tap!


2 Oct 2015

Draining away

Since last weekend's progress, Jaimin has made what he can of the tremendous weather and been working most evenings on the drains. The delay in the delivery of a 90 degree shallow access chamber and associated risers and lid, which also contained the pipe jointing lubricant, meant that he had to start at the top of the drain and work towards the corner. This was not ideal but anyway he needed to measure out the drains and work out the angles at the back of the bathroom, where all the soil pipe and drains enter the building, as nothing was very straight or square.

The process was a bit like lego but involved a lot of measuring, cutting, chamfering (with one of these - thanks to IndigoMilk for the tip) and fitting, using different angled fittings (15, 30 or 45 degrees), T- and Y- Junctions, and the pipe itself.


Shallow access chamber to enable rodding/clearing at the corner
Once the pipe was laid and everything fitted, these was the inevitable last bit of digging to fit the shallow access chamber, and then everything slotted together.

During the process, because he was alone, lots of mud and grit were entering the pipe ends and he decided that this was too risky. So, Guy McCallum was summoned after he had offered his noble assistance. Together, and very quickly, they removed the laid pipe, cleared the trench again, washed out all the seals and replaced the whole thing with lubricant, clean and easy.

Nice and clean...
On Thursday the builders returned with self levelling compound, and the result is a lovely level and hopefully easy to work floor. 


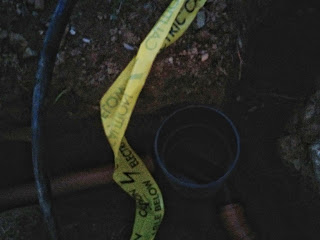
After fixing the "hockey stick" to the wall with a special 32mm clip and small hammer fixings (M6 x 40mm) Jaimin fitted the end of the electrical duct in to the hockey stick, and began burying it with the "Caution!" tape. He then positioned the downpipe bottle gulley and fitted pipe to take it to the trench and run above the soil pipe. 


The incoming water pipe (blue 25mm MDPE) was cut in to 2 sections. Section 1, the incoming pipe, was lagged (wrapped in foam insulation and zip-tied) from the point it became visible in the trench, right into the house. (22mm insulation fits 20-25mm pipe...). A piece of 110mm pipe was then slid over the lagged MDPE acting as a duct, which was then partially filled (as best as possible) with expanding foam. The outside of this duct was also covered in a layer of expanding foam; handy way to empty the tin.
 

The other section of pipe was lagged, then buried alongside the perforated pipe (French Drain), and will be the supply for the garden tap.

Not buried yet. The lagging is just like the stuff you had on your bike as a kid, for padding.
The final job was to start backfilling the trenches which has started and will be continued this weekend.