Since last weekend's progress, Jaimin has made what he can of the tremendous weather and been working most evenings on the drains. The delay in the delivery of a 90 degree shallow access chamber and associated risers and lid, which also contained the pipe jointing lubricant, meant that he had to start at the top of the drain and work towards the corner. This was not ideal but anyway he needed to measure out the drains and work out the angles at the back of the bathroom, where all the soil pipe and drains enter the building, as nothing was very straight or square.
The process was a bit like lego but involved a lot of measuring, cutting, chamfering (with one of these - thanks to IndigoMilk for the tip) and fitting, using different angled fittings (15, 30 or 45 degrees), T- and Y- Junctions, and the pipe itself.
 |
| Shallow access chamber to enable rodding/clearing at the corner |
Once the pipe was laid and everything fitted, these was the inevitable last bit of digging to fit the shallow access chamber, and then everything slotted together.
During the process, because he was alone, lots of mud and grit were entering the pipe ends and he decided that this was too risky. So, Guy McCallum was summoned after he had offered his noble assistance. Together, and very quickly, they removed the laid pipe, cleared the trench again, washed out all the seals and replaced the whole thing with lubricant, clean and easy.
 |
| Nice and clean... |
On Thursday the builders returned with self levelling compound, and the result is a lovely level and hopefully easy to work floor.
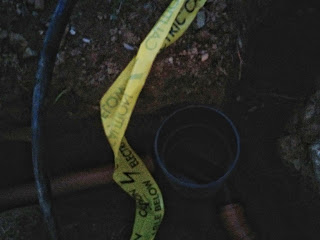
After fixing the "hockey stick" to the wall with a special 32mm clip and small hammer fixings (M6 x 40mm) Jaimin fitted the end of the electrical duct in to the hockey stick, and began burying it with the "Caution!" tape. He then positioned the downpipe bottle gulley and fitted pipe to take it to the trench and run above the soil pipe.
The incoming water pipe (blue 25mm MDPE) was cut in to 2 sections. Section 1, the incoming pipe, was lagged (wrapped in foam insulation and zip-tied) from the point it became visible in the trench, right into the house. (22mm insulation fits 20-25mm pipe...). A piece of 110mm pipe was then slid over the lagged MDPE acting as a duct, which was then partially filled (as best as possible) with expanding foam. The outside of this duct was also covered in a layer of expanding foam; handy way to empty the tin.
The other section of pipe was lagged, then buried alongside the perforated pipe (French Drain), and will be the supply for the garden tap.
 |
| Not buried yet. The lagging is just like the stuff you had on your bike as a kid, for padding. |
The final job was to start backfilling the trenches which has started and will be continued this weekend.


No comments:
Post a Comment