Pages

13 Jun 2016

28mm Copper, More insulation

Having got the TS in place, it was time to work out how the pipework would fit (if it would fit) and where the F&E tank would go. This was not too bad in the end but required some destruction of gable insulation and rafter insulation in order to fit some shelf brackets and also fit the tank in place.

After the shelves were fitted with an extra noggin in the gable end, the F&E tank could take its seat.
Then it was on to bringing the 28mm copper from the woodburner to the TS.  This was already partially complete and really just needed a few more sections of pipe.


There is still some more copper to install, for all the other connections (hot water etc). Then the wall will need to be built around the TS and a door made as well.

Jaimin also installed a full length joist across the ground floor ceiling at the stariwell, as it looks much more properer. It's the slightly darker one parallel to the copper pipes...


Also the window reveal insulation is complete, and the ceiling of the bathroom is also insulated. This just leaves the bathroom walls, kitchen walls and some odds and ends to be insulated with PIR board before we can install finishing covers.

10 Jun 2016

Thermal store upstairs

Tressle Tom stopped by again last night on his way home from work to lend a muscle. Builder Ben also kindly came over because hauling the thermal store up the ladder was going to be a 3 man job.

Jaimin's main concern was that the TS would not fit in place as planned. Although it does (good news) the placement of the F&E tank is going to be tricky. It will work (it has to!) but not without a fiddle.

The TS in all its glory, with dial gauge, TPRV and HiLimit Autostat

8 Jun 2016

Well. For stairs, that is...

Insulation boarding has been ongoing, and upstairs is complete apart from fiddly bits around windows. Downstairs has started in earnest.


More exciting is that we took delivery of the much anticipated Thermal Store. This will keep water hot for 24 hours once it's heated by the stove.

Feed & expansion tank

Thermal store with plate heat exchanger


Even more exciting, and because the TS needs to go upstairs, we have cut out the joists ready for the staircase. This was done with a bit of head scratching and some help from Thomas (aka Tressle Tom) who had some good ideas and got things kicked off.

Tressle Tom with the first cut joist
Jaimin then set about noggining (or nogginging) the stair well.


Plenty to do before the stairs make an appearance but at least things are happening. 

4 Jun 2016

Hidden copper hidden, Rockwool rocked.

The past few days and today, Jaimin has managed to complete both hot and cold runs from the stove to the bathroom in 28mm copper, as well as finish the upstairs ceiling insulation and both gables with PIR board. The copper runs needed to be insulated, then clipped in place, and then the Tyvek patched up and finally rockwool installed.

In case it's unclear, when you install a stove with a back boiler, there is always the risk that it is left burning when all the water is already hot. In that case, temperature (and pressure) build up and if there was no vent would be a bomb. This system is vented, so steam / hot water will simply pour out, however you don't actually want any boiling going on so the best thing to do is to be able to cool down the water just a little, all the time. Sounds odd, but there is a good reason. This is the purpose of the bathroom radiator, and the 28mm copper pipe runs to and from the stove to the bathroom, which will be an "always on" heat-dump radiator to ensure the heat from the boiler is always able to be dissipated somewhere. It's nice to have it used in the bathroom, as we can use it as a towel rail/clothes dryer/bathroom heater...

Upstairs looking NASA-like 
Added a bit down stairs. Variety = spice of life... 


The T of copper in this image will be the bottom of our towel rail, where an immersion element can also be turned on to heat it in case the fire is not on.

The "kitchen radiator" has been assigned a spot... 
The next step is to make sure all the windows are noggined and ready to be insulated, then go heavy on the PIR board and turn the cottage in to a spaceship.

31 May 2016

More copper, gable insulation

Jaimin has been setting out and soldering copper connections for the heat leak (bathroom) radiator. Having never soldered let alone solder water pipes, this involved a YouTube training course which seems to have paid off.

The cold run is complete, and most of the hot run is done, leaving a non return valve and then the actual radiator to be done. The hot connection to the wood burner also remains, as well as the pipes to the thermal store.

Cold return from the bathroom back to the stove
Cold return at the stove; hot flow not complete.
On Sunday, Simon came to help, and cut the 25mm PIR to size for the west gable wall. They then installed some more ceiling 20mm boards.

Tonight Jaimin made up some noggins to frame the east gable and insulated it as well.

27 May 2016

Chimney adaptor, first copper, sink pipes.

Yesterday Jaimin managed to spend some time with Ollie in the evening, and designed an outline plan for the heat leak radiator copper pipe runs. Following some Youtube tutorship, the first copper connections were made, and then the pipe was passed behind the stud and clipped in to place with a constant rise, as it will be a gravity driven circuit.


The local blacksmith was called upon to build a rough and ready flue adapter to go from the 6" stainless steel flexi flue to the main chimney, which will enable the bypassing of the void space above the stove. This will hopefully improve the draw and also eliminate the need to heat a void of cold air. This needs to be fitted before the stove goes in.


Once Ollie left, Jaimin did some easy Hep2O connections to bring the kitchen sink and bathroom basin pipe out through the walls.


25 May 2016

Progress with odds & ends; Stove delivery

Progress has been good but a bit "all over the place" depending on what takes ones fancy at any time and also who may be on hand to offer assistance.

Rockwool has been installed in the overhead space in the bathroom (commonly referred to as a ceiling, but emphasis placed on the overhead-ness due to the clouds of itchy rockwool that cascade on to the installer during the fitting). 

 
 Some sections of wall have not yet been Rockwooled, because they have "something" coming in from behind the wall - a pipe, a duct etc. In the kitchen and bathroom there is a duct for the extractor fans. These are now fitted....

For the kitchen, the kitchen waste pipe also needed installing. During the capping of the chimney, a lot of jackdaw nest was pushed to the fireplace and this needed to be cleared out, as it was damp, wet and dirty (and stank). So a hole was made in the lovely Tyvek and the insulation board behind it, and the muck tidied out.


Then the kitchen waste pipe and duct were installed and taped in place, with rockwool following:

Kitchen waste pipe heading to the outside through the old fireplace. 


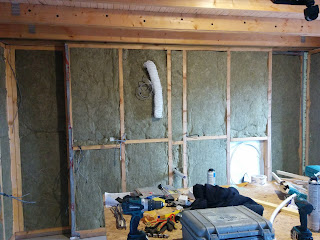
The bathroom duct was easier and then the rockwool was installed. The 15mm Hep2o was also tee'd in to the 22mm Feed/Hot water circuit. That is the coil of white pipe in the picture below. 


Perhaps more than anything worth mentioning and after literally months and days of deliberation and calculation, and agonising over all sorts of figures, we purchased and took delivery of our brand new Stovax Stockton 8HB Multi-Fuel Boiler Stove. This has 5kW output to the room and 8kW(!) to water, which we are looking forward to firing up once all the pipe work is installed. At 140kg it was no mean feat to get it in to the house but luckily we had Lucy and the helpful delivery man Derrick on hand to assist.


There is a lot of "nogginging" - putting bits of wood for screws to be screwed in to and fix plasterboard - to be done in places such as around the windows. This was much of Saturday's work .
Ollie was on hand to help out and this also meant a bit more of the roof spare insulation could be fitted.


Yesterday Jaimin did a pressure test to 3 bar on all the plastic runs of Hep2O which were all good and mean there are no leaks in the system at this stage.